A watery or bland Thermomix pumpkin soup usually needs a better balance of pumpkin, liquid and seasoning, rather than more cream. Thermomix pumpkin soup is a blended soup made with pumpkin, onion and stock, cooked and puréed in the machine’s mixing bowl. For a thick, creamy result, weigh the edible pumpkin, begin cautiously with the liquid, and make sure the pieces are completely tender before blending. Roasting first is the flavour-focused option, while cooking everything in the bowl is the convenient weeknight method. The ideal liquid ratio and model-specific settings still need kitchen testing before a single formula can be recommended as reliably best.
Quick Summary
- Best for flavour: Roast the pumpkin first, then blend it with aromatics and stock.
- Best for convenience: Use a one-bowl method, cooking the pumpkin until completely tender.
- Best way to control thickness: Weigh peeled pumpkin and add liquid gradually instead of automatically pouring in the full amount.
- For extra body: Potato adds starch; coconut milk or cream adds richness.
- For safety: Follow your exact Thermomix model’s manual, respect its maximum fill line, and blend hot food gradually.
The roasting recommendation, finished texture and exact liquid quantities need confirmation through side-by-side Kitchen Memo tests.
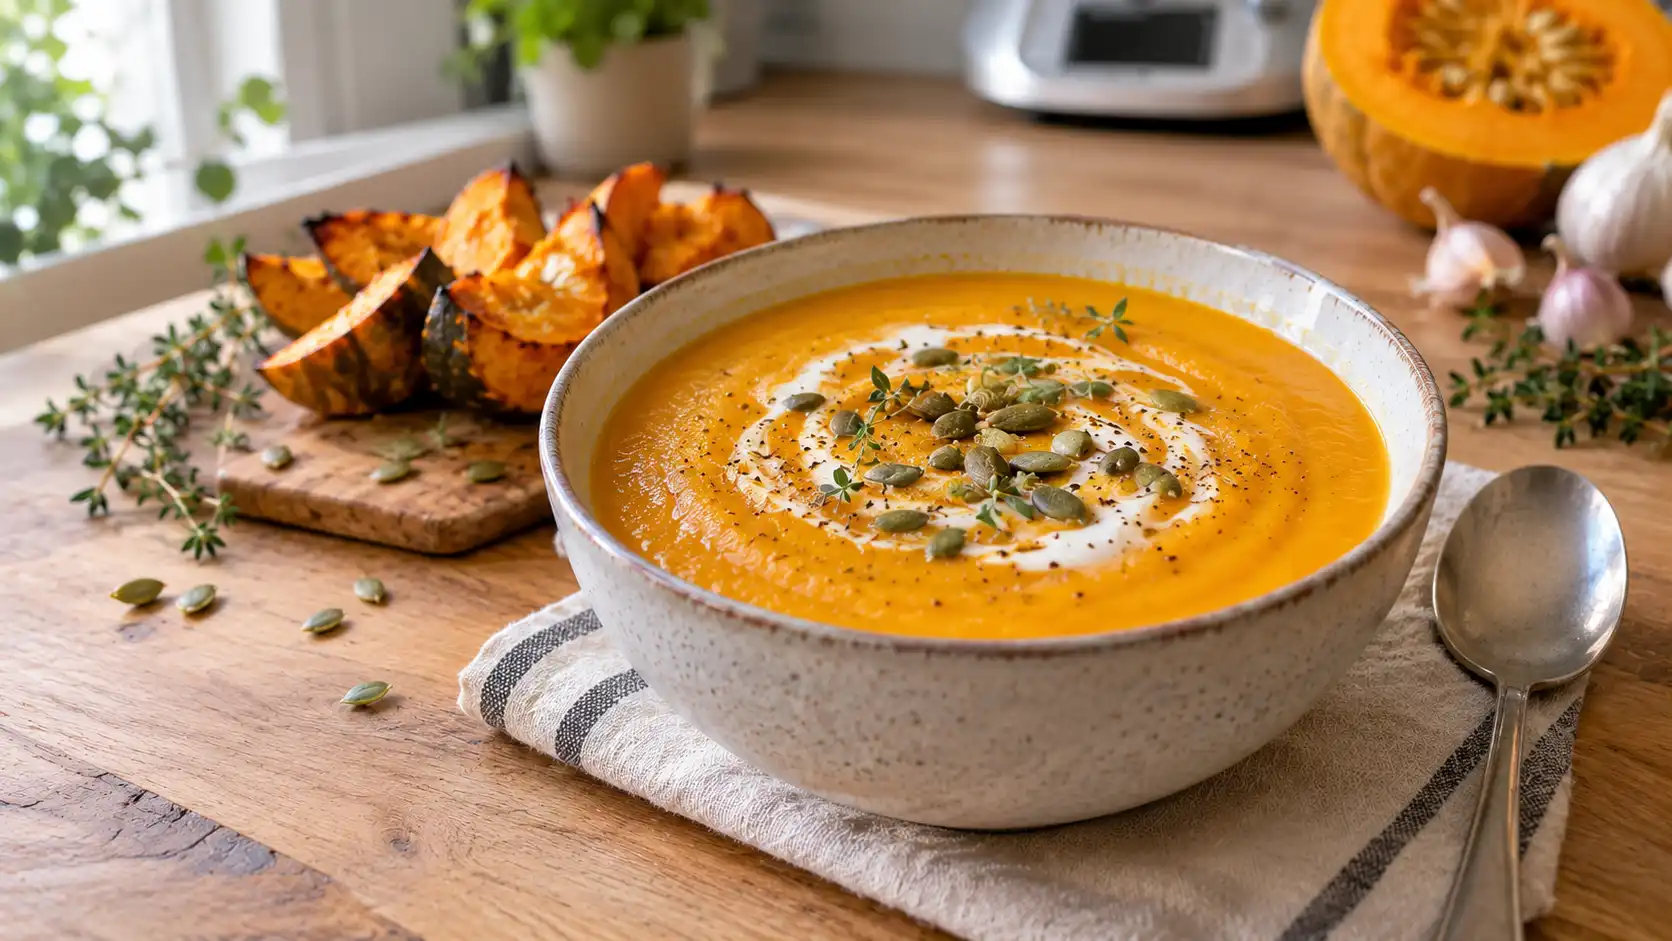
Roast First or Cook in the Bowl? The Flavour vs. Time Trade-Off
The first decision in a Thermomix pumpkin soup recipe is whether to roast the pumpkin before cooking the soup or put the raw pumpkin straight into the mixing bowl.
Roast first when flavour is the priority; use the one-bowl method when convenience matters more. Roasting exposes the pumpkin to dry heat, removes some moisture and develops browned edges. Cooking directly in the Thermomix softens the pumpkin without the separate roasting stage.
This is a useful starting recommendation, not a confirmed Kitchen Memo test result. A comparison using identical pumpkin, seasonings and serving temperatures is needed to establish the actual differences in flavour, time and final consistency.
Roast-first method (oven or air fryer)
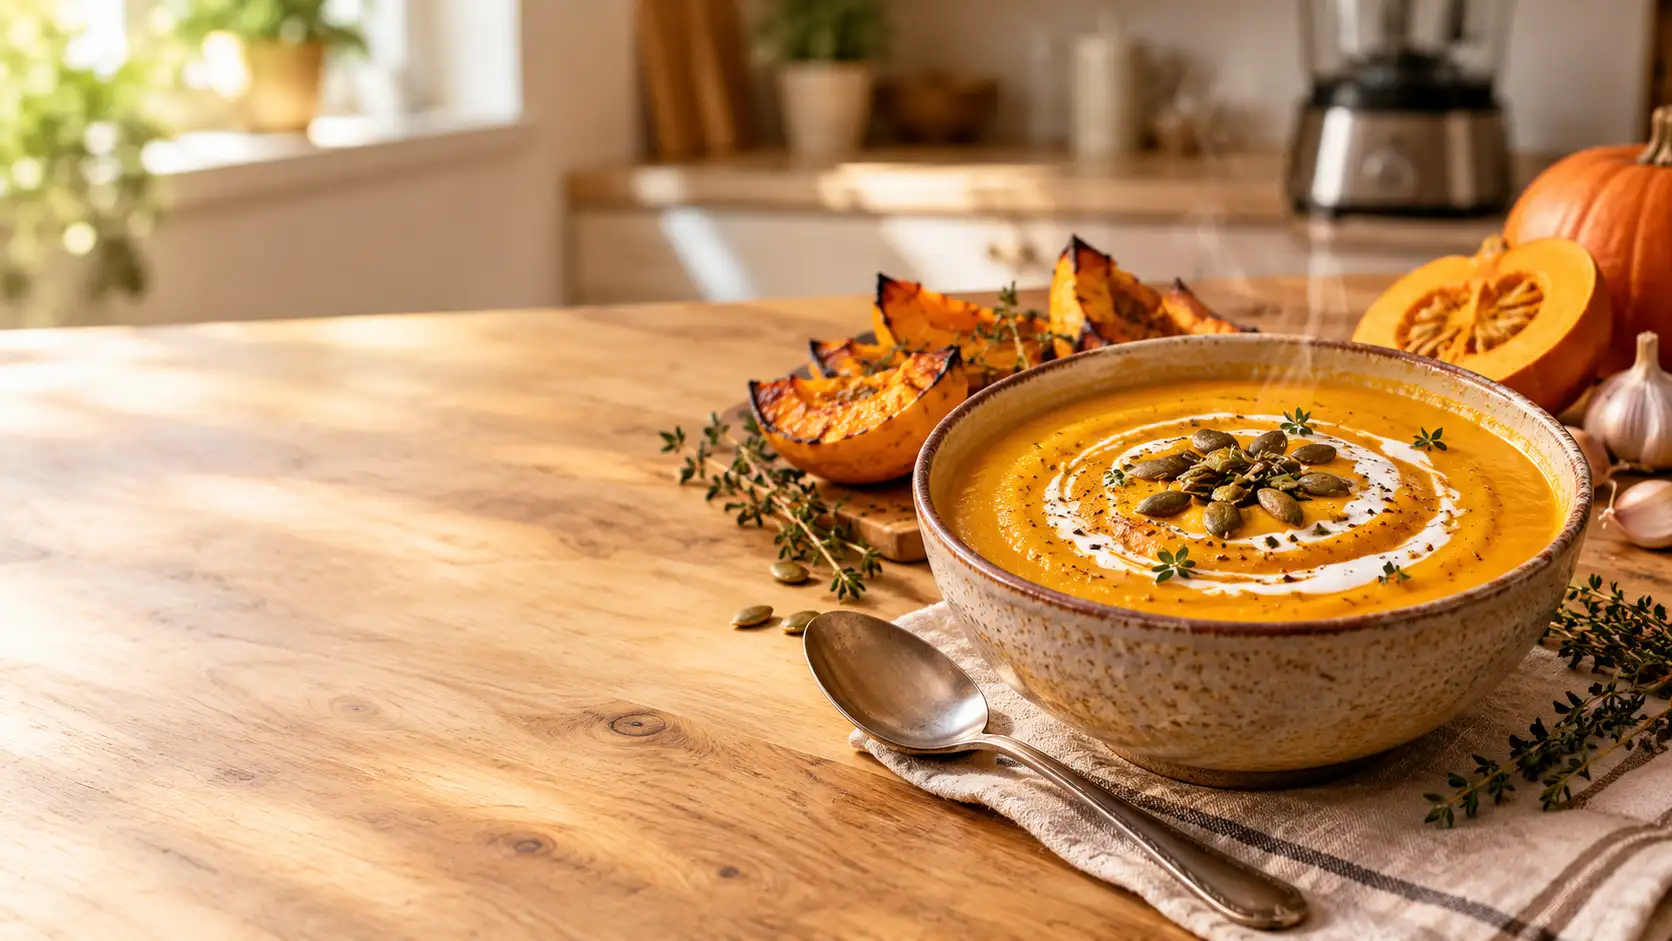
Roasting is worth considering when you want a deeper, more rounded pumpkin flavour. Spread evenly cut pumpkin pieces in a single layer, with enough space between them for moisture to escape.
For an oven trial, use 200°C (400°F) as a starting temperature, then assess the pieces by their appearance and texture rather than relying on the clock alone. They should be fork-tender, with browned edges but no burnt patches.
The precise roasting time for a given variety and batch size needs testing. Your outline identifies published roast-first recipes using 180°C for 40 minutes with 2 kg of pumpkin, but that is one recipe’s method, not a universal roasting time.
An air fryer can roast smaller batches, but the cooking time and moisture loss need to be evaluated for the particular appliance and pumpkin cut.
For more on even cuts, tray spacing and browning, see Kitchen Memo’s guide to roasting vegetables.
Once the pumpkin is roasted, transfer the edible flesh to the Thermomix bowl. Add the sautéed aromatics and a measured amount of stock, cook as needed to bring the ingredients together, then blend according to your model’s instructions.
Important: Roasting reduces moisture, so a roasted pumpkin batch may need less added liquid than one made with raw pumpkin. The size of that difference is and should be measured rather than assumed.
One-bowl method
The one-bowl method skips the separate roasting tray. It is particularly practical when you want a simple soup with fewer dishes to wash.
The general sequence is:
- Chop the onion and garlic.
- Sauté them in a little butter or oil to soften their sharp, raw flavour.
- Add peeled, evenly cut pumpkin and measured stock.
- Cook until the pumpkin is completely tender.
- Blend until smooth, then check the thickness.
- Adjust seasoning and add any optional cream or coconut milk.
The exact time and temperature depend on the piece size, pumpkin variety and model-specific settings. The proposed settings in the recipe section below must be checked before publication.
If you enjoy using the machine for other soups, Kitchen Memo’s Thermomix French onion soup guide provides another example of how aromatics and cooking technique shape a soup’s flavour.
Roast-first vs. one-bowl

| Factor | Roast first | One-bowl |
| Active time | Requires cutting, arranging and transferring the pumpkin | Fewer handling steps |
| Total time | Includes the separate roasting stage | Generally the more convenient route |
| Flavour | Expected to have more browned, concentrated notes | Expected to have a milder cooked-pumpkin flavour |
| Liquid needed | May need less because roasting removes moisture; exact amount | Depends on pumpkin moisture and cooking conditions |
| Washing-up | Mixing bowl plus tray or air-fryer basket | Primarily the mixing bowl and preparation utensils |
| Best for | A flavour-focused batch when time permits | A simpler everyday soup |
To make this comparison definitive, prepare both methods with the same pumpkin variety and starting weight. Record prep time, actual cooking time, finished soup weight or volume, added liquid and blind taste scores.
Which Pumpkin Works Best, and Do You Need to Peel It?
Pumpkin variety affects sweetness, moisture, texture and the amount of edible flesh available after peeling and removing seeds. A pumpkin that becomes smooth with little added liquid is useful for thick soup; one that releases more water may require more careful liquid management.
Kent, Jap and butternut are useful varieties to compare, but the best option for Kitchen Memo should be confirmed by testing rather than presented as a proven winner.
Pumpkin varieties at a glance
| Variety | Likely characteristics to investigate | Peeling guidance | Most useful test |
| Kent | Commonly selected for savoury cooking; sweetness and density vary | Peel for a consistently smooth result unless skin-softening is verified | Measure raw edible flesh, cooked yield and soup texture |
| Jap / kabocha-type | Often described as dense with a rich flavour; actual results vary by cultivar | Test skin tenderness separately from flesh texture | Compare peeled and unpeeled batches |
| Butternut | Widely available, with a smooth flesh that suits blended soups | Peeling is the predictable choice for this recipe | Measure moisture-related changes and final yield |
Regional naming also matters. Kent and Jap are common names in Australia; butternut is used widely in English-speaking markets, while crown prince, kabocha and sugar pumpkin refer to different squash types rather than exact substitutes for one another. Choose the actual variety available to you, not just the name printed in an online recipe.
Should you peel pumpkin for Thermomix soup?
For the most predictable smooth texture, peel the pumpkin, remove the seeds and stringy centre, and weigh the edible flesh. This gives you a more consistent basis for calculating the liquid.
Leaving skin on should be treated as a separate method to test. Some skins may soften sufficiently, but toughness and fibrous flecks can affect the result. Do not assume that every variety or every pumpkin skin will blend equally well.
Cut the flesh into even pieces so the pieces cook at a similar rate. Very large pieces can remain firm in the centre while smaller ones soften and begin breaking down.
For Kitchen Memo’s final variety recommendation, record the variety, edible weight, peeling yield, cooking time and the texture after blending. Until those records exist, do not publish a claim that one variety is definitively the best.
How Much Liquid per Kilogram of Pumpkin? (Why Recipes Disagree)
The amount of liquid is one of the biggest variables in Thermomix pumpkin soup. Weigh the edible pumpkin, start with a controlled amount of liquid and thin the soup gradually after blending. Adding too much stock at the beginning is harder to correct than adding a little more later.
Published recipes differ because they use different varieties, roasting methods, vegetable additions and preferred textures. A recipe designed for a loose soup may not suit someone looking for a thick soup that holds its shape on a spoon.
Why published ratios differ
The outline identifies published examples ranging from roughly 1:1 to 1:2 stock-to-pumpkin ratios, along with recipes using one cup of liquid. These numbers should not be treated as directly interchangeable without checking what each author measures, how the pumpkin is prepared and how much other vegetable matter is included.
An official Cookidoo pumpkin soup recipe lists 500 g of peeled pumpkin and 500 g of water, as well as onion, carrot and vegetable stock paste. It serves four and lists a 30-minute total time. This is a published reference recipe, not evidence that the same ratio produces the thickest possible soup with every variety.
Roasted pumpkin loses moisture during roasting, while raw pumpkin releases moisture as it cooks. Potato also changes the finished body of a soup. These differences help explain why one fixed stock quantity will not necessarily work for every version.
Liquid ratio by variety and method
The following table separates the reference point from the measurements still needed.
| Batch or method | Pumpkin weight | Liquid measurement | Final consistency |
| Published Cookidoo reference | 500 g peeled pumpkin | 500 g water listed in the recipe | Recipe-specific result; not independently tested for this article |
| One-bowl Kitchen Memo method | Weigh 1 kg edible pumpkin for the test batch | Determine starting stock weight and reserve liquid for adjustment | Record finished weight or volume and a defined thickness score |
| Roast-first Kitchen Memo method | Weigh 1 kg raw edible pumpkin before roasting | Measure roast yield and required stock after roasting | Record roast loss, finished weight or volume and thickness |
| Kent, Jap and butternut comparison | Use the same starting edible weight for each variety | Test the same starting quantity, then adjust consistently | Compare spoon-coating, pourability and visible fibres |
How to measure liquid properly
Use a kitchen scale rather than relying on cup measures. Weigh the peeled pumpkin before cooking, note the amount of stock added and record any liquid added after blending.
For the roast-first method, weigh the pumpkin before roasting and again after roasting. The difference gives the batch’s weight loss, although it should not be described as pure water loss because handling and any discarded material can also affect the measurement.
Use the same serving temperature and the same spoon test for each sample. For example, a practical texture score can distinguish a soup that pours immediately from one that coats a spoon and from one so thick that it barely moves. The scoring criteria should be set before tasting.
Which broth is best?
Vegetable stock is a straightforward choice when you want a vegetarian or vegan base, provided the product and any additional ingredients suit the intended diet. Chicken stock gives a different savoury character.
Stock concentrates, cubes and ready-made stocks can differ substantially in salt content. Check the label, begin conservatively with additional salt, and season the finished soup after blending. Do not assume that a tablespoon of one stock paste supplies the same saltiness as a tablespoon of another.
The purpose of stock is to provide liquid and seasoning, not to hide the flavour of the pumpkin.
The Recommended Method: Thermomix Pumpkin Soup Step by Step
The method below is a test-ready framework, not a fully kitchen-verified Kitchen Memo recipe. It combines an official Thermomix ingredient reference with a controlled approach to liquid and texture. Exact starting liquid quantity, timings and model-specific settings must be confirmed before this article makes a firm promise of a thick result.
Ingredients & Quantities
The ingredient list below follows the published Cookidoo reference where quantities are available. Its quantities are not claimed to have been tested as a new Kitchen Memo formula.
| Ingredient | Quantity | What it contributes |
| Brown onion | 1, approximately 180 g, peeled and halved | Savoury aromatic base |
| Butter | 20 g (about 1½ tbsp) | Richness and flavour |
| Pumpkin | 500 g (about 1.1 lb), peeled and cut into pieces | Main flavour, colour and body |
| Carrot | 1, cut into pieces | Additional sweetness and vegetable body |
| Water | Up to the 500 g | Cooking liquid |
| Vegetable stock paste | 1 tbsp | Seasoning and savoury flavour |
| Pouring or whipping cream | 30 g (about 2 tbsp), optional | Richness and smoother mouthfeel |
| Salt and black pepper | To taste | Final seasoning |
| Fresh basil | Optional, to garnish | Fresh herbal finish |
For the official source and its device compatibility, refer to the Cookidoo pumpkin soup recipe.
The official list includes 500 g water for 500 g pumpkin. For a thick-soup version, Kitchen Memo needs to verify how much of that water to add initially and how much to reserve. Do not describe a lower starting amount as tested until the comparison has been completed.
Step-by-step
- Prepare the pumpkin. Peel, remove the seeds and fibrous centre, and cut the flesh into evenly sized pieces. Weigh the edible pumpkin after trimming so the weight used in the recipe represents what actually enters the bowl.
- Chop the aromatics. Chop the onion and, if using it, garlic according to the model’s recommended procedure.
- Sauté the onion. Add the butter and cook the onion until softened and translucent. This develops the savoury base.
- Add the pumpkin, carrot, stock paste and measured liquid. Add the ingredients according to the final tested formula, taking care not to exceed the appliance’s fill limit. Do not automatically use all the reference recipe’s water until the lower-liquid trial has established a suitable starting amount.
- Cook until fully tender. A fork should enter the largest pumpkin pieces easily. If the centre remains firm, continue cooking using the settings confirmed for your model. The reference source lists a 30-minute total recipe time; that is not a guarantee that every pumpkin size and variety will be tender at the same point.
- Check the texture before adding more liquid. Once the pumpkin is tender, blend following the manufacturer’s safe hot-food procedure. Look for a uniform purée without obvious hard pieces. Add reserved liquid gradually until the soup reaches the intended consistency.
- Season after blending. Taste a small spoonful and adjust salt and pepper. Add the optional cream only after checking the plain soup so you can judge its existing flavour and body.
- Record the result. Note the pumpkin variety, starting weight, liquid added, cooking time, blending procedure and final yield. Take a photograph of the actual result and record whether it is thin, spoon-coating or excessively stiff.
The step where most cooks can go wrong
The critical points are adding too much liquid too early, blending before the pumpkin has become fully tender, and overfilling the mixing bowl. Each can undermine the finished texture or create a safety problem.
Optional: steaming pumpkin in the Varoma
Steaming is a possible alternative when you want to cook pumpkin separately before blending it with the aromatics and stock. However, the supplied brief contains no verified Varoma settings for the pumpkin size and quantity intended for this recipe.
For now, treat steaming as an alternative to investigate, not as a published, timed method. The test must establish the appropriate cut size, liquid level, steaming time and tenderness cues for each intended model. The method should also explain how the steamed pumpkin’s collected liquid is handled, since that affects the amount of additional stock needed.
Time, Yield & Equipment
| Item | Current status |
| Scaling | Do not assume the recipe can be doubled in one batch; confirm bowl capacity and the applicable fill marking |
| Preparation | Allow time to peel, deseed, weigh and cut the pumpkin |
| Reference time | Cookidoo lists 30 minutes total for its separate pumpkin soup recipe |
| Yield | Reference recipe lists 4 portions; Kitchen Memo’s final yield must be measured |
| Equipment | Thermomix, kitchen scale, knife, chopping board and serving bowls |
| Optional equipment | Oven tray or air fryer for roasting first |
For the final yield, weigh or measure the finished soup and define the serving size. This is more reliable than assuming all varieties and methods produce the same number of bowls.
Settings by model (TM5 / TM6 / TM7, plus TM31 note)
Do not assume that the same manual settings will be appropriate for every model. The machine, its accessories and its safety instructions may differ.
| Model | What to confirm before publication |
| TM5 | Cook time and temperature, suitable accessory over the lid during cooking, maximum fill and hot-food blending procedure |
| TM6 | Updated safety guidance, measuring-cup versus simmering-basket instructions during hot cooking, maximum fill and blending procedure |
| TM7 | Current user-manual guidance, maximum quantities, appropriate soup-cooking mode and safe blending instructions |
| TM31 | Model-specific temperature and speed equivalents, maximum capacity and instructions for hot liquids |
The official Thermomix TM7 manual page provides access to the model’s user manual. For TM6 owners, Vorwerk’s measuring-cup safety announcement explains the particular precaution for cooking at 95°C (200°F) or above.
Blending hot soup safely
Blending hot soup requires care because hot liquid may splash or escape as the contents move. Follow the instructions for the exact Thermomix model and use only its specified accessories.
Vorwerk’s general safety guidance for the TM5 and TM6 stresses that hot-food blending speeds should be increased gradually. It also warns against exceeding the mixing bowl’s maximum fill marking. See the official TM5 safeguards and TM6 safeguards.
In practice:
- Cook the pumpkin until fully tender before blending.
- Keep the total contents safely within your bowl’s marked maximum capacity.
- Use the lid accessory specified for blending by your model.
- Start at a low speed and increase gradually; never use an abrupt high-speed setting for hot soup.
- Never force the lid open or cover an opening with a tea towel.
- During hot cooking, follow the model-specific instructions for the measuring cup or simmering basket. On the TM6, Vorwerk directs users to use the simmering basket rather than the tightly fitting black measuring cup when cooking at 95°C or above, subject to the specific recipe instructions.
The soup-cooking temperature guidance also matters: Vorwerk’s TM6 safety announcement says soups should be cooked at no more than 100°C (212°F). These safety rules should take precedence over generic recipe instructions.
Making It Creamy Without Cream (Potato, Sweet Potato, Coconut Milk)
A creamy pumpkin soup does not necessarily need dairy cream. Potato can provide body, sweet potato adds its own sweetness, and coconut milk gives a richer mouthfeel with a distinct flavour.
These options serve slightly different purposes. A thick soup is not automatically a rich-tasting soup, and adding fat is not the same as controlling excess liquid.
The Thermomix official soups guide also suggests small quantities of potato or rice as ways to thicken soup. Kitchen Memo still needs side-by-side tests before declaring one of these additions the best choice for this pumpkin recipe.
Potato vs. sweet potato vs. coconut milk vs. cream
| Addition | Main effect to expect | Flavour change | Dairy-free? | Vegan? |
| Regular potato | Adds starch and vegetable body | Usually mild | Yes | Yes, if the other ingredients are vegan |
| Sweet potato | Adds body and sweetness | Noticeably sweeter | Yes | Yes, if the other ingredients are vegan |
| Coconut milk | Adds richness and a creamy mouthfeel | Coconut flavour and additional sweetness may be noticeable | Yes | Yes, if the other ingredients are vegan |
| Dairy cream | Adds richness and a smooth mouthfeel | Creamier, dairy-forward finish | No | No |
Substitution table
| Dietary or cooking preference | Possible adjustment | What to check |
| Vegan | Use vegetable stock and plant-based additions such as coconut milk or potato | Confirm the stock paste and all other ingredients contain no animal-derived ingredients |
| Dairy-free | Omit butter and cream; use a suitable plant oil and, if desired, coconut milk | Check labels, especially for stock products |
| Gluten-free | Choose a certified or appropriately labelled gluten-free stock product when needed | Check packaged stock paste and any seasonings for gluten-containing ingredients |
| Lower-sodium | Use a lower-sodium stock or dilute a concentrated stock according to its label | Taste before adding extra salt; flavour intensity will vary by product |
These substitutions describe ingredient choices, not verified dietary guarantees. Ingredient labels, manufacturing cross-contact and individual requirements still matter.
Should you put potatoes in pumpkin soup?
Potato is optional, not compulsory. It is a sensible ingredient to test when the soup needs more body without a strong dairy flavour.
However, adding potato does not automatically fix every watery soup. The pumpkin may simply be undercooked, or the quantity of added liquid may be too high. Correct those issues before assuming that another ingredient is needed.
Troubleshooting: Why Your Soup Is Watery, Bland, Too Sweet or Stringy
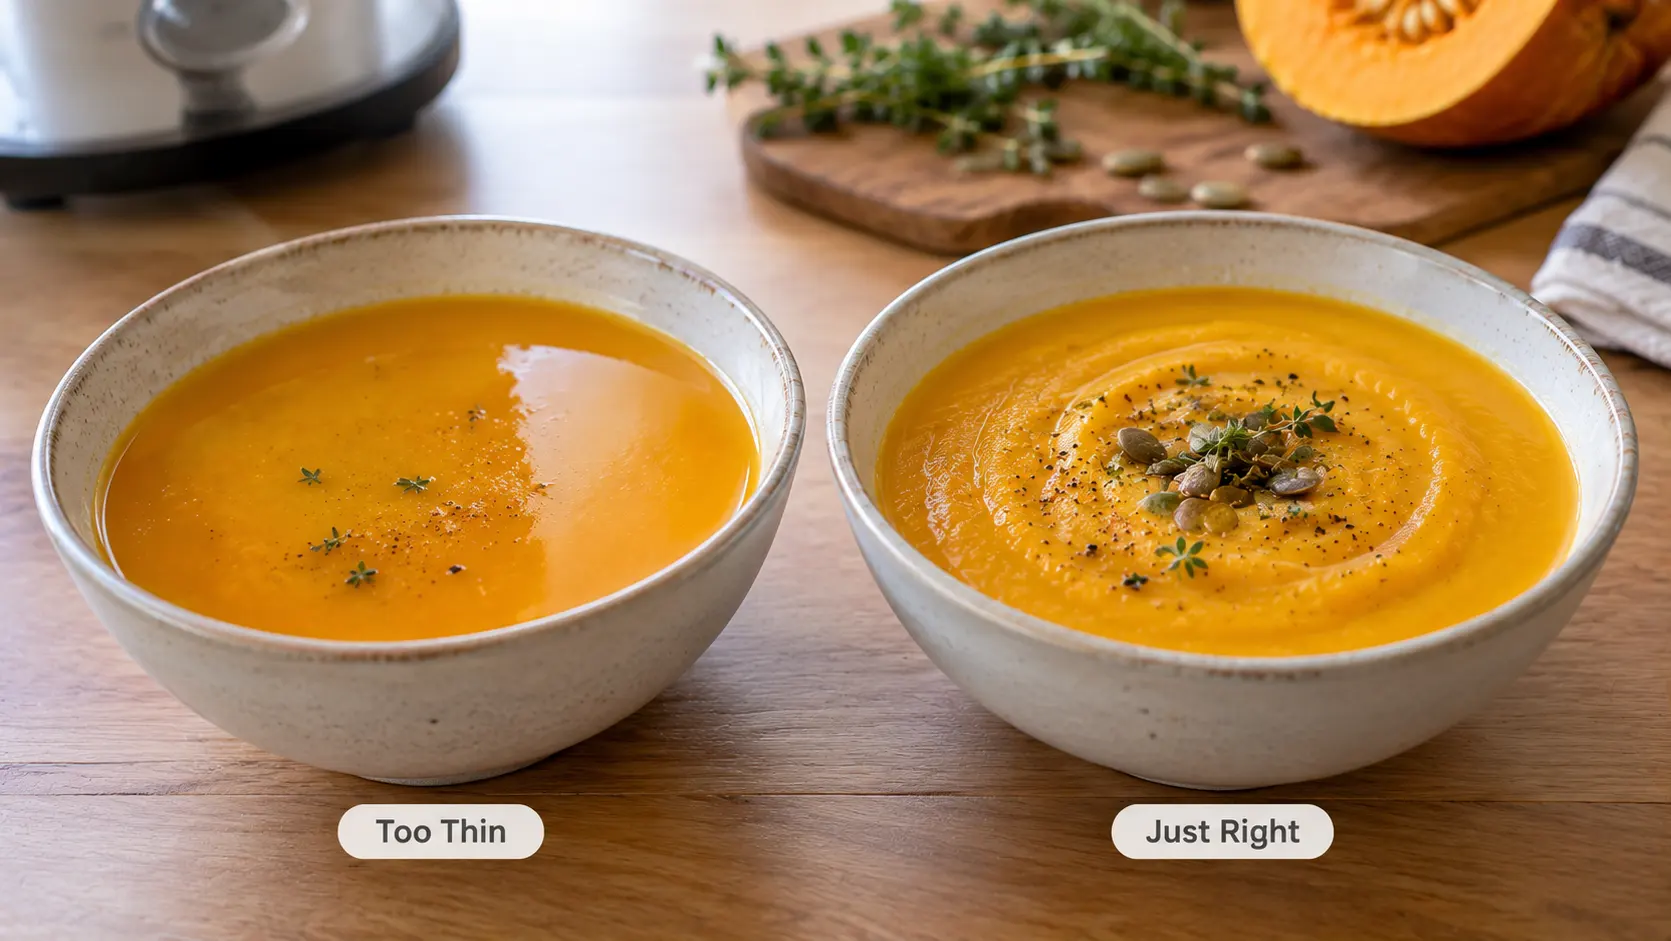
Most pumpkin soup problems can be investigated by checking the ingredient balance, cooking stage and seasoning before making further changes.
The table below gives practical corrections to try. The precise fixes still need to be logged in Kitchen Memo’s own test batches before they can be claimed as proven results for the published recipe.
| Problem | Possible cause | What to try | How to prevent it |
| Too watery | Too much stock, moisture released from the pumpkin or insufficient vegetable body | Add a suitable thickener such as cooked potato, or reduce the soup using a method permitted by your appliance instructions | Reserve some liquid until after blending |
| Bland | Underseasoning, mild stock or insufficient contrast | Taste and adjust salt, pepper and a little acid gradually | Check the stock’s strength and season at the end |
| Too sweet | Naturally sweet pumpkin, carrot or sweet potato | Try a small amount of lemon or lime juice, salt and a suitable spice; assess each addition separately | Choose additions according to your desired flavour |
| Stringy or grainy | Fibrous flesh, skin, incompletely softened pieces or uneven cooking | Check tenderness, identify fibres, and continue cooking where appropriate before safely reblending | Peel for consistency and cut the pumpkin evenly |
| Catching or scorching at the bowl base | Insufficient liquid, residue, unsuitable settings or ingredients becoming too thick | Stop and follow your model’s instructions; do not scrape a hot, running bowl or keep heating a scorched mixture | Use an appropriate liquid level and verified settings |
How to fix watery Thermomix pumpkin soup
First, assess whether the soup is actually under-thickened or simply still hot. Texture changes somewhat with serving temperature, so evaluate a small spoonful safely before making adjustments.
If too much stock has been added, one option is to incorporate cooked potato or another appropriate thickener. Another possible approach is reducing liquid, but only if the method is compatible with your exact model and its lid/accessory safety requirements.
Do not assume that switching to an uncovered cooking mode is automatically safe. For Thermomix cooking, use the specified accessories and stay within the manufacturer’s temperature and capacity limits.
How to fix bland pumpkin soup
Taste before adding more ingredients. If the soup tastes flat, the issue may be insufficient salt, a mild stock or a lack of contrast.
Add a small amount of salt, taste again, then consider a little lemon juice, black pepper or a warm spice if appropriate. Make one adjustment at a time to avoid replacing a bland soup with an overly sour or salty one.
Different stocks contain different amounts of salt, so the final seasoning should not be based only on the quantity specified in another recipe.
How to fix pumpkin soup that is too sweet
Pumpkin and carrot can naturally give a soup a sweet profile. Sweet potato and coconut milk may increase that impression.
Try a little acidity from lemon or lime juice, or use a savoury spice to balance the taste. Add each in small amounts and retaste. More liquid can dilute sweetness, but it also dilutes the pumpkin flavour and may make the soup too thin.
Why is the soup stringy or grainy?
Stringy texture can come from fibrous pumpkin flesh, tough skin or pieces that have not softened completely. Graininess may also be linked to how the vegetable breaks down when blended.
Check for visible fibres and make sure the largest pieces are tender before blending. Peeling is the most predictable starting approach for this recipe. Longer blending should not be used as a substitute for cooking an underdone vegetable until soft.
Common beginner mistakes
- Adding all the stock before knowing how much the pumpkin will contribute.
- Cutting pieces very unevenly, so they finish cooking at different times.
- Blending while the centre of the largest pumpkin pieces remains firm.
- Assuming that every pumpkin variety has the same sweetness and moisture.
- Adding salt before considering the stock’s existing salt content.
- Exceeding the mixing bowl’s maximum fill level when scaling the recipe.
- Applying one model’s safety instructions or settings to another Thermomix without checking its manual.
These are useful checks when diagnosing a failed batch. The order in which to address them should be refined through recipe testing and recorded reader feedback.
What Makes Pumpkin Soup Taste Better
A good pumpkin soup needs more than a smooth texture. It should have enough savoury depth to balance the pumpkin’s sweetness, and the seasoning should support rather than hide the vegetable flavour.
A useful starting point is to build a balanced base with softened onion, appropriate stock and careful seasoning. Roasting the pumpkin is another option to investigate for deeper flavour.
Practical flavour boosters
- Ginger: Adds a fresh, warm note that works with the natural sweetness of pumpkin.
- Curry powder or curry paste: Gives the soup a more pronounced spiced character. Check the paste’s salt and heat levels before adding more seasoning.
- Nutmeg: A small amount can complement a creamy-style soup without dominating it.
- Smoked paprika: Adds a smoky, savoury flavour.
- Lemon or lime juice: Adds acidity that can help balance a sweet-tasting soup.
- Toasted pumpkin seeds: Provide crunch and contrast against a smooth purée.
Use one or two additions at a time. This makes it easier to understand what changed and keeps the underlying pumpkin flavour identifiable.
What is the secret ingredient in pumpkin soup?
There is no single secret ingredient that will suit every pumpkin and recipe. A little acid, warm spice or deeper roasted flavour may improve a particular batch, but the best choice depends on what the soup lacks.
For Kitchen Memo, this is a testable question rather than a finished claim. A useful flavour trial would compare the base soup with individual additions, using identical portions and a consistent rating scale for sweetness, savouriness, texture and overall preference.
Storage, Freezing and Reheating
Cool pumpkin soup promptly, divide it into shallow containers and store it in the refrigerator or freezer. Avoid leaving a large, deep container of hot soup at room temperature while it cools.
The USDA’s leftovers and food safety guidance recommends refrigerating or freezing perishable leftovers within two hours, using shallow containers to support rapid cooling, and keeping refrigerated leftovers for three to four days. Its storage guidance lists soups and stews for two to three months in the freezer for best quality.
Storage guide
| Storage method | General guidance | Practical handling |
| Refrigerator | 3–4 days | Refrigerate promptly in covered, shallow containers at 4°C (40°F) or below |
| Freezer | About 2–3 months for soups and stews | Freeze in airtight, suitable containers with space for expansion |
| Reheating | Heat leftovers to 74°C (165°F) | Heat thoroughly, stirring as appropriate, and verify the temperature |
| Room-temperature holding | No more than 2 hours | Discard perishable soup left out longer; the limit is 1 hour when the surrounding temperature exceeds 32°C (90°F) |
The freezer duration is a quality guide, not a claim that frozen food suddenly becomes unsafe after that point if kept continuously frozen. Quality can deteriorate with longer storage.
Can you freeze Thermomix pumpkin soup?
Yes. Freeze it in airtight, freezer-suitable containers after it has been cooled and handled safely. Portioning the soup before freezing makes it easier to thaw only what you need.
Soup made with cream or coconut milk may change texture during freezing and reheating. That is a quality issue rather than a reason to disregard safe storage procedures.
How to reheat soup in the Thermomix
Reheat the portion in the bowl using the settings allowed by your model, stirring as appropriate until the soup is heated throughout. The exact time depends on portion size, starting temperature and model, so a fixed reheating time should not be published before testing.
If the soup has thickened during refrigeration, assess the texture and add a little liquid if needed. If dairy is present, gentle reheating may help preserve the desired mouthfeel, but the result should be checked rather than promised.
Don’t reheat more soup than you intend to serve repeatedly, and return unused portions to safe storage promptly.
Can You Make It Without a Thermomix?
Yes. The same basic approach works on the stovetop: cook the aromatics, simmer the pumpkin in stock until completely tender, then blend until smooth with a stick blender or a suitable jug blender.
For a stovetop version:
- Soften the onion in butter or oil in a suitable pot.
- Add the chopped pumpkin, other vegetables if using them, and measured stock.
- Simmer until the pumpkin is easily pierced with a fork.
- Blend safely, following the blender manufacturer’s instructions for hot liquids.
- Check the consistency and seasoning, then adjust gradually.
For a jug blender, avoid filling it with hot soup beyond its permitted capacity. Hot steam and expanding liquid can force the lid open or cause splashing. Follow the blender’s specific hot-liquid directions instead of assuming that every blender can process boiling soup safely.
For the roast-first alternative, roast the pumpkin separately and transfer it to the pot once tender. The same principle applies: measure the liquid, blend only after the vegetable is soft, and add more stock only as needed.
Conclusion
The best Thermomix pumpkin soup starts with a suitable pumpkin, carefully measured liquid and a fully cooked vegetable before blending. Roast first when flavour is the priority, or use the one-bowl method for convenience. Potato can add body, while coconut milk or cream adds richness. Final liquid ratios and settings still need kitchen testing.
For more cooking ideas, explore Kitchen Memo’s Recipes collection and Kitchen Guides.
FAQs
1. How do I make pumpkin soup in the Thermomix?
Soften onion in butter or oil, add chopped pumpkin and measured stock, and cook until the pumpkin is fully tender. Blend gradually according to your model’s safety instructions, then adjust the thickness and seasoning. See the recommended method above for the full recipe framework.
2. Should you put potatoes in pumpkin soup?
No, potatoes are optional. They can add body without dairy cream, but the exact improvement in thickness for this recipe needs testing before it can be recommended as a proven result.
3. How can I make pumpkin soup less sweet?
Try adjusting the seasoning with a little salt, a small amount of lemon or lime juice, or a suitable warm spice. Make one small adjustment at a time and taste before adding more; the best balance depends on the pumpkin and stock.
4. How do you steam pumpkin in the Thermomix?
Cut the pumpkin into even pieces and steam them using the Varoma settings specified for your particular model. The correct time depends on the piece size and quantity, so verify the settings and tenderness cues before publishing or following a fixed steaming time.
5. What broth is used in pumpkin soup?
Vegetable stock and chicken stock are both suitable. Vegetable stock is the natural starting point for a vegetarian version, while chicken stock gives a different savoury flavour. Check the stock’s salt content before seasoning the finished soup.
6. What is the secret ingredient in pumpkin soup?
There is no single universal secret ingredient. A little acid, ginger, nutmeg, curry seasoning or roasted pumpkin may improve the flavour, depending on what the soup needs.
7. What are common mistakes when making pumpkin soup?
Adding too much liquid, cutting uneven pumpkin pieces, blending before the pumpkin is tender and overfilling the mixing bowl are important problems to watch for. Follow the model’s safety instructions and adjust liquid gradually.
8. Can you freeze pumpkin soup?
Yes. Cool it promptly, portion it into airtight freezer-suitable containers and freeze it. For best quality, use frozen soup within about two to three months; reheat thoroughly and expect that soups containing cream or coconut milk may change texture.