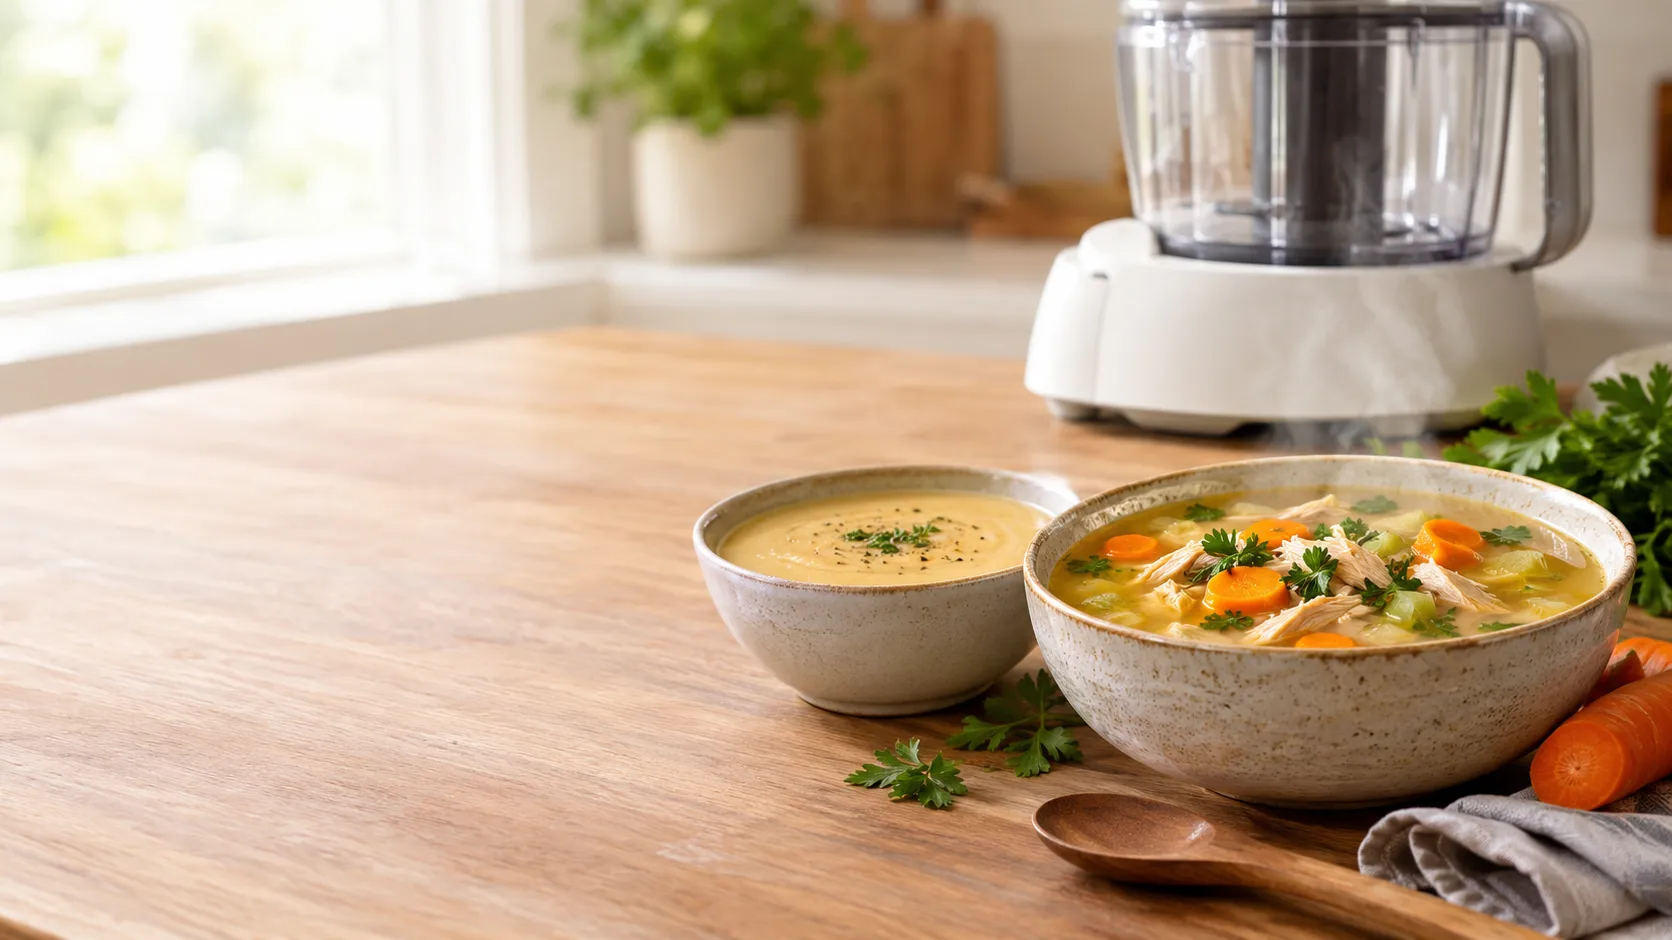
Thermomix chicken soup combines chicken, vegetables, aromatics and stock in a convenient, machine-controlled cooking method, but the right settings depend on the recipe, chicken size and Thermomix model. The TM5 and TM6 have a 2.2 L maximum mixing-bowl capacity, while the TM31 has a 2 L capacity. The official Thermomix model-compatibility guidance explains why recipes should not automatically be transferred between machines. For food safety, chicken should reach an internal temperature of 74°C (165°F). Respect the maximum fill marking, use the correct lid accessories, and check the largest chicken pieces with a thermometer.
Quick Summary
- Best chicken cut: Breast suits a leaner soup, while thigh is a useful alternative when you prefer a richer flavour. Confirm the texture and timing differences through side-by-side testing.
- Published cooking-time reference: Cookidoo lists 30 minutes total for its Hug in a mug chicken soup, compatible with TM5, TM6 and TM7. This is a published recipe time, not a universal setting or a Kitchen Memo test. View the published recipe.
- Most important safety rule: Never exceed the bowl’s maximum fill line, and follow the instructions for your exact model.
- Leftovers: Refrigerate promptly. Cooked soup generally keeps 3–4 days in a refrigerator at 4°C (40°F) or below, following FoodSafety.gov’s cold-storage guidance.
Which Thermomix Chicken Soup Should You Make?
Choose a style based on your available time, desired texture and the chicken you have. A simple vegetable-and-chicken soup suits a weeknight; noodles make it more substantial, while blended vegetables or a suitable thickener create a creamier result. Chicken soup can be a comforting warm meal on a cold day, but it should not be presented as a cure for a cold.
| Situation | Recommended version | Time guidance | Model notes |
| Quick meal | Boneless chicken breast with vegetables | Follow a compatible recipe; published examples include 30-minute total cooking schedules | Confirm that the specific recipe supports your model |
| Richer-tasting soup | Boneless chicken thigh | Establish the cooking time through recipe testing | Confirm chicken reaches 74°C/165°F internally |
| Family vegetable soup | Chicken, carrot, celery and stock | Depends on the recipe and cut | Check the maximum fill marking |
| Smooth soup | Cook vegetables, then blend following the manual | Confirm the blending method and timing for your model | Follow hot-liquid safety instructions |
| First Thermomix soup | A simple, model-compatible published recipe | Follow its specified total time | Check the correct lid and accessory instructions first |
For more machine-cooked soup inspiration, Kitchen Memo’s Thermomix pumpkin soup guide explains how ingredient moisture and added liquid affect the final texture.
Breast, Thigh, Bone-In or Whole Chicken: What Changes?
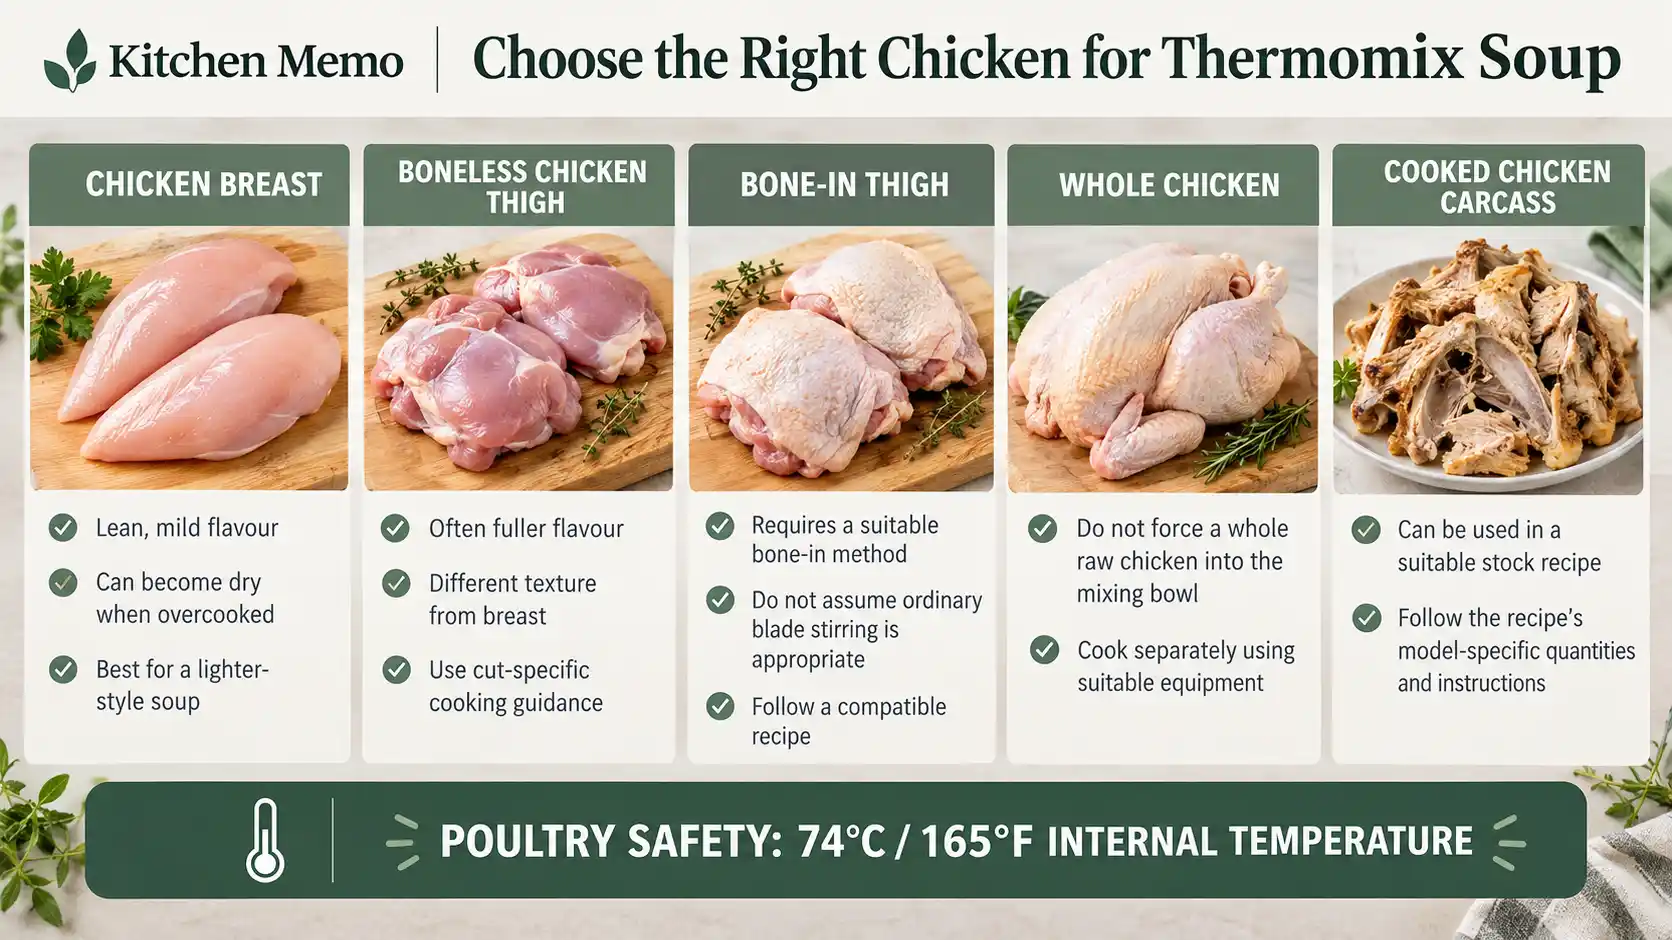
| Chicken choice | Flavour and texture | Cooking guidance | Best use |
| Boneless breast | Lean, mild meat; can become dry when overcooked | Check the largest pieces for doneness | Lighter-style soup |
| Boneless thigh | Generally richer-tasting, with more fat and connective tissue | Do not assume breast timings apply | Fuller-tasting soup |
| Bone-in thigh | Bone changes the size and shape of the meat pieces and how the broth develops | Use a recipe that specifically accommodates this cut and appliance | A bone-in variation requiring testing |
| Whole chicken | Too bulky for an ordinary mixing-bowl soup method | Cook with suitable equipment outside the bowl, then use the meat in a compatible soup | Larger family batches |
| Cooked carcass | Can form part of a stock-based soup | Follow a recipe designed for the carcass and model | Stock-focused soup |
Why the cut changes the result.
Breast meat is leaner and gives you less room for overcooking before its texture deteriorates. Thigh meat contains more connective tissue and fat, so it behaves differently during simmering. Neither cut has one universal cooking time: piece size, starting temperature, surrounding liquid and appliance settings all matter.
Bone-in chicken needs particular care in an appliance recipe. Do not assume pieces containing bones are suitable for unrestricted blade stirring. Use a verified method that specifies the cut, placement and stirring settings.
Using a whole chicken or carcass.
Do not force a whole raw chicken into the Thermomix mixing bowl or improvise a carcass method by filling the bowl with extra water. Cook the bird separately, then use the meat or carcass in a recipe designed for that purpose.
Cookidoo’s Chicken and Vegetable Soup is a useful published reference. It lists a cooked chicken carcass, vegetables, pearl barley and 1,500 g water, with a total time of 1 hour 30 minutes and compatibility for TM31, TM5, TM6 and TM7. Follow the complete recipe’s model-specific instructions rather than transferring its quantities to a different soup.
Doneness check.
The USDA recommends cooking all poultry to an internal temperature of 74°C (165°F), measured with a food thermometer. Check the thickest part of the largest chicken pieces, not just the surrounding broth. Colour alone is not a reliable safety test. See the USDA safe-temperature chart.
Compare breast, boneless thigh and bone-in thigh using the same soup formula, then document their tenderness, moisture and cooking times to establish reliable cut-specific recommendations.
Chunky, Noodle, Corn or Creamy: Choosing Your Style
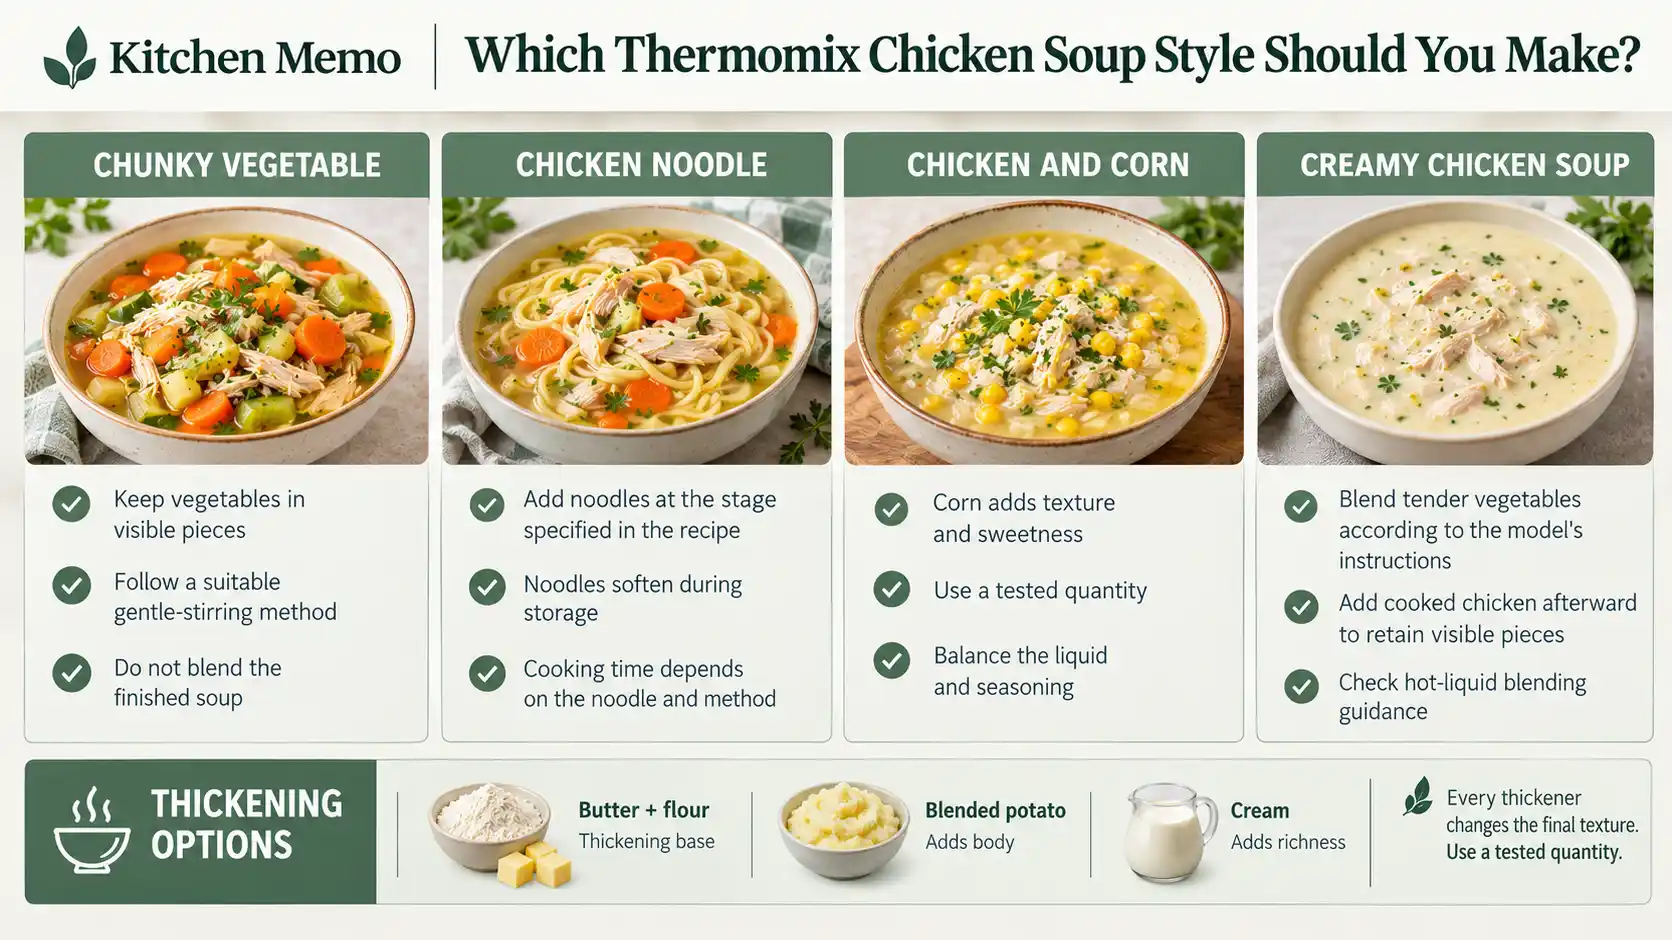
| Style | How to get it | Expected texture | Dietary considerations |
| Chunky vegetable | Keep vegetables in pieces and use a suitable gentle-stirring method | Brothy with visible pieces | Check stock ingredients for dietary requirements |
| Chicken noodle | Add noodles according to a tested recipe | Brothy, with soft noodles | Choose gluten-free noodles if required |
| Chicken and corn | Include corn in a validated quantity | Sweeter, with added texture | Check packaged stock and seasonings |
| Creamy | Use a tested thickener or cream-based finish | Smooth or velvety | Dairy-free alternatives change the flavour |
Chunky vs creamy.
For a chunky soup, avoid blending the finished mixture and use a recipe with appropriate stirring instructions. To make a creamy vegetable base while retaining visible chicken pieces, cook the vegetables until tender, blend the vegetable mixture following the model’s hot-liquid instructions, and incorporate the cooked chicken afterward.
This is a suggested method rather than a verified Kitchen Memo result. Confirm the ingredient quantities and blending procedure before presenting it as a tested recipe.
Chicken noodle and chicken and corn.
Noodles absorb broth as they cook and may continue softening in stored soup. Add them at the stage specified by the tested recipe rather than assuming they can simmer for the entire chicken-cooking period. Chicken and corn soup also needs a confirmed liquid balance because corn contributes both texture and sweetness.
Record the noodle cooking time, final broth volume and texture after refrigeration and reheating before making specific recommendations about noodle timing or leftovers.
Thickening options.
Butter and flour can form a roux-like thickening base; blended potato contributes starch and vegetable body; cream adds richness and a dairy flavour. Each changes the soup differently. Use a tested quantity rather than adding flour, potato or cream by guesswork.
Stock Paste, Homemade Stock or Bone Broth: What Makes It Taste Better?
The strongest starting points for flavour are balanced seasoning, properly softened aromatics and stock that complements the chicken rather than overpowering it. Check the stock label before adding salt: concentrated stock pastes, cubes and ready-made liquids vary.
| Stock choice | Convenience | Body | Sodium and ratio |
| Stock paste and water | Convenient and easy to measure | Depends on the product | Follow the product label and validate the ratio per litre |
| Homemade stock | Requires advance preparation | Varies with ingredients and cooking method | Measure the final quantity and check the seasoning |
| Bone broth | Convenient when already prepared | Depends on its formulation | Check the product’s label and ingredient information |
Official Thermomix recipes demonstrate why a single stock-paste ratio should not automatically be applied to every soup. For example, the published Hug in a mug recipe lists 800 g water and 1 tablespoon of chicken stock paste, while the Tex-Mex chicken soup uses 650 g water and 1 teaspoon of stock paste alongside tomatoes and seasoning. These are recipe-specific formulas, not universal ratios. See the Hug in a mug recipe and Tex-Mex chicken soup.
For another example of how aromatics and stock shape the flavour of machine-cooked soup, explore Kitchen Memo’s Thermomix French onion soup guide.
What not to put in chicken broth.
Avoid adding ingredients simply because they are described online as secret flavour boosters. Excess salt can make the finished soup unpleasant, while herbs, spices, vegetables and acidic ingredients can change the flavour substantially. Add optional lemon juice, fresh herbs or extra seasonings gradually, tasting as you go.
Before attributing bitterness or cloudiness to a specific ingredient, test it under controlled conditions and record the amount, cooking temperature and result.
Does it get better the longer you cook it?
Not necessarily. More time can change the broth’s body and flavour, but chicken texture can suffer if the meat stays hot long after reaching doneness. Time and temperature work together, so longer cooking should be justified by a specific method—such as a stock recipe—not used as a blanket rule for all chicken cuts.
Which ingredient makes you feel better?
For a comforting bowl, warmth, hydration, familiar flavours and a pleasant salt balance may be the most relevant qualities. Do not describe a particular ingredient as a proven cold treatment or make medical claims without appropriate evidence.
Why Results Differ on Your Machine: TM5, TM6 and TM31
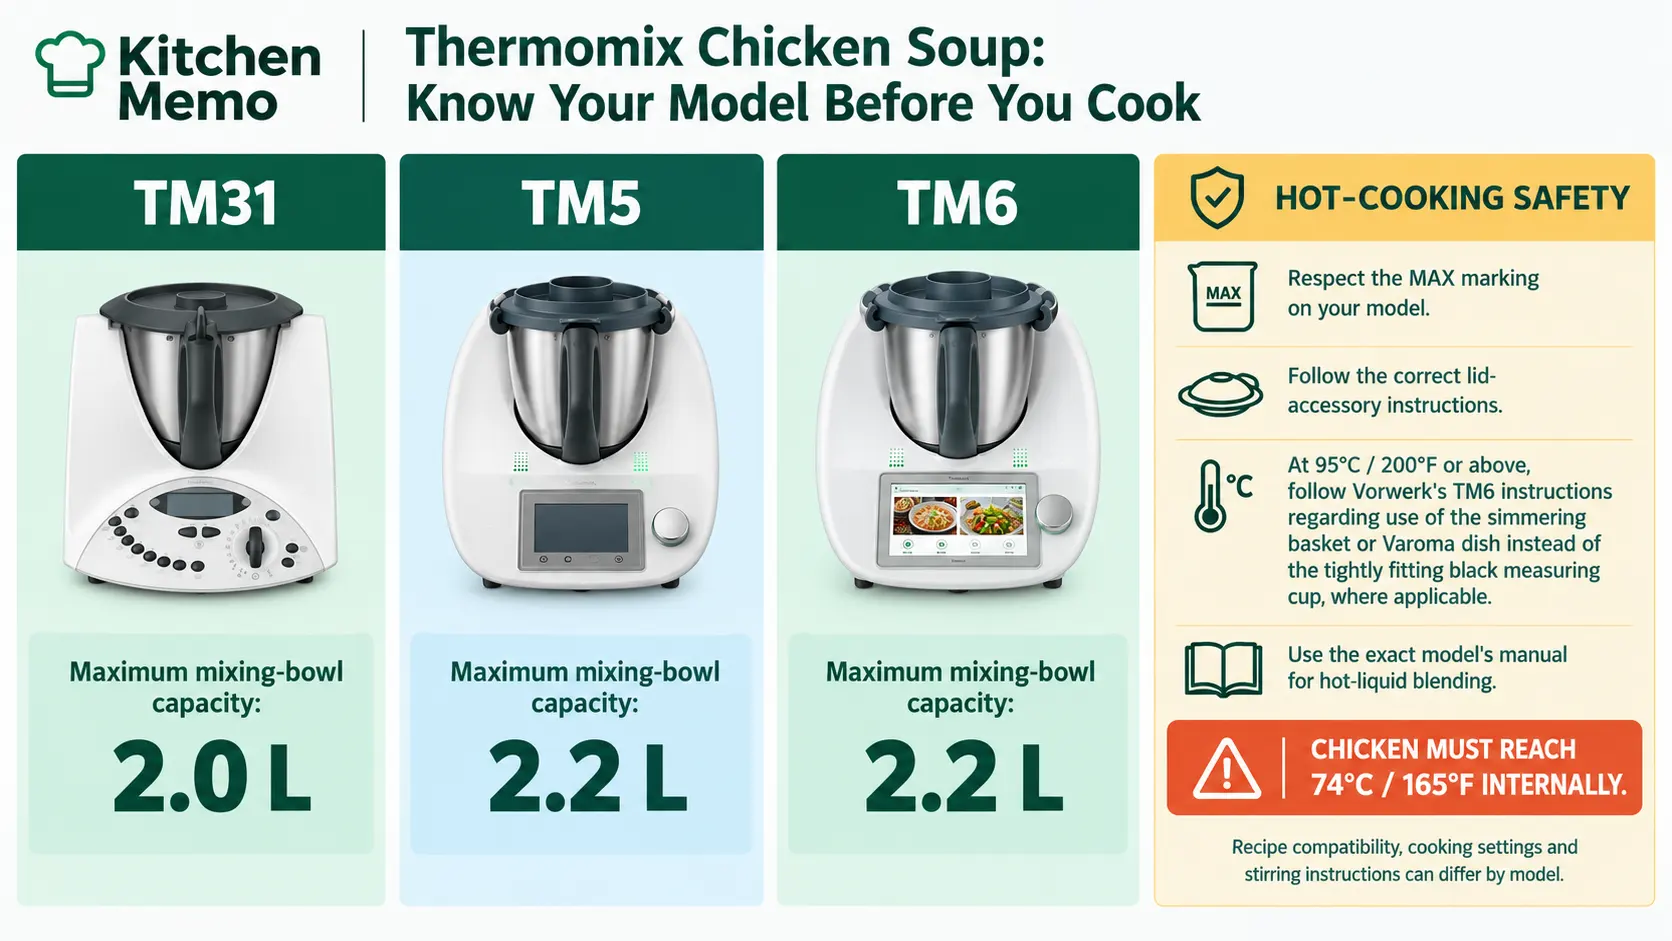
Vorwerk confirms that the TM5 and TM6 mixing bowls have a 2.2 L maximum capacity, while the TM31 has a 2 L capacity. The manufacturer also warns that recipes are not automatically compatible with every model. See the official model-compatibility guidance.
| Model | Bowl maximum | Lid accessory and stirring guidance | Recipe settings |
| TM5 | 2.2 L | Follow the TM5 manual for hot cooking and keep the opening unobstructed | Use a model-compatible recipe with verified time, temperature and speed |
| TM6 | 2.2 L | At 95°C (200°F) or above, follow Vorwerk’s instructions for using the simmering basket or Varoma dish instead of the tightly fitting black measuring cup, where applicable | Confirm the specific recipe settings |
| TM31 | 2.0 L | Follow the TM31 manual and use only the intended accessories | Confirm settings against a TM31-compatible recipe |
For the TM6, consult Vorwerk’s measuring-cup safety announcement. For the TM5, see the official TM5 safeguards. For TM31-specific cooking and blending procedures, consult the manufacturer’s instructions for that model before transferring settings from a newer machine.
The MAX line and overfilling.
Treat the marked maximum as a hard limit, not a target for every hot soup. Vegetables, chicken and liquid all occupy space, and ingredients may move or foam while heating. A recipe that approaches the limit before cooking begins leaves little room for movement.
Do not add extra water or double a recipe without recalculating the quantities and checking the appliance’s instructions.
Preventing splatter.
Keep the lid correctly positioned and its opening unobstructed. Use the intended Thermomix accessories, following the instructions for your model and cooking temperature. On the TM6, follow Vorwerk’s guidance about the simmering basket or Varoma dish for cooking at 95°C (200°F) or above instead of the tightly fitting black measuring cup, where applicable.
If food begins to boil over, stop the appliance according to its safety instructions. Never reach over escaping steam or hot liquid.
Blending hot soup safely.
Hot soup can splash or erupt during blending. Keep the volume within the model’s permitted limit, fit the lid correctly and increase blending speed gradually. Never use a tea towel to seal the lid opening or force the lid open while the contents are moving.
Check the exact TM31, TM5 and TM6 manuals for model-specific hot-liquid blending procedures before publishing particular blending speeds or fill levels.
The Recommended Method: A Core Thermomix Chicken Soup Recipe
The recipe framework below defines a practical direction for a Kitchen Memo chicken soup, but it is not yet a fully validated formula. The ingredient quantities, preparation time, cooking settings and final yield should be established through recipe testing before publication as a complete recipe.
Time, Yield and Equipment.
| Item | Recipe planning guidance |
| Preparation time | Record the time needed to weigh, peel and chop the ingredients |
| Cooking time | Establish a tested time for each chicken cut and model |
| Yield | Measure the finished volume and define a consistent serving size |
| Equipment | Thermomix TM31, TM5 or TM6; kitchen scale; knife; chopping board; food thermometer |
| Slow cooker or stovetop alternative | Use a separately tested recipe; do not transfer Thermomix settings directly to other equipment |
Published Thermomix soup recipes show that total times vary with the method and ingredients. Cookidoo lists 30 minutes for its Hug in a mug soup and 40 minutes for its Tex-Mex chicken soup. Neither value establishes a universal cooking time for every chicken cut and model.
Ingredients and Quantities.
The following table establishes the proposed ingredient structure. Final metric and US quantities should be recorded during recipe testing so that readers can reproduce the same result.
| Ingredient | Metric | US measurement | Role |
| Boneless chicken breast or thigh | Final tested weight | Final tested weight | Main protein |
| Onion | Final tested weight | Final tested measure | Aromatic base |
| Carrot | Final tested weight | Final tested measure | Sweetness and texture |
| Celery | Final tested weight | Final tested measure | Savoury aroma |
| Garlic | Final tested weight | Final tested measure | Aromatic flavour |
| Chicken stock or stock paste with water | Final tested quantity | Final tested quantity | Liquid and seasoning |
| Herbs and black pepper | Final tested quantity | Final tested quantity | Finishing flavour |
| Optional noodles or corn | Final tested weight | Final tested measure | Variation |
For a ready-to-cook alternative while this framework is being validated, consult a published recipe explicitly marked compatible with your appliance, such as Cookidoo’s Hug in a mug chicken soup for TM5/TM6/TM7 or its Chicken and Vegetable Soup for TM31/TM5/TM6/TM7. Follow the source recipe’s full ingredient list and settings rather than combining quantities from different recipes.
Step-by-Step Method.
- Prepare the ingredients. Cut the boneless chicken into even pieces and weigh all ingredients. Keep raw chicken and its utensils separate from cooked food.
- Prepare the vegetable base. Chop the onion, carrot, celery and garlic according to the recipe tested for your machine. Do not assume one chopping speed produces the same result on every model.
- Add the stock and chicken. Use the validated ingredient quantities and follow the model-specific temperature and reverse-stirring instructions. Keep the contents below the appliance’s maximum fill marking.
- Check doneness. Measure the thickest part of the largest chicken pieces. Poultry must reach 74°C (165°F) internally. Continue cooking safely if it has not reached that temperature. See the USDA safe-temperature chart.
- Finish to the chosen style. Add noodles or corn at the tested stage. For a creamy variation, blend the vegetable base using the model’s safe hot-liquid procedure and incorporate the cooked chicken afterward.
- Record the result. Note the cut, piece size, ingredient weights, temperature, cooking time, speed, internal temperature and final yield. Photograph the actual texture and document any splashing, dryness or overcooking.
Critical step: Do not rely solely on the timer or the temperature displayed by the appliance to determine whether every chicken piece is safe. Confirm the internal temperature of the food.
Cook-Time and Temperature Comparison.
A useful 100°C-versus-90°C comparison requires consistent ingredients and controlled cooking conditions. The matrix below shows the measurements to collect before recommending particular settings.
| Setting to test | 15 minutes | 30 minutes | 60 minutes |
| 100°C | Record chicken texture, broth clarity and internal temperature | Record the same measurements | Record the same measurements |
| 90°C | Record chicken texture, broth clarity and internal temperature | Record the same measurements | Record the same measurements |
For a meaningful comparison, keep chicken cut, piece size, quantity, starting temperature, stock and stirring setting consistent. Record internal temperature as well as texture, and repeat the comparison on each model before concluding that one setting is more reliable.
Common Problems and How to Fix Them
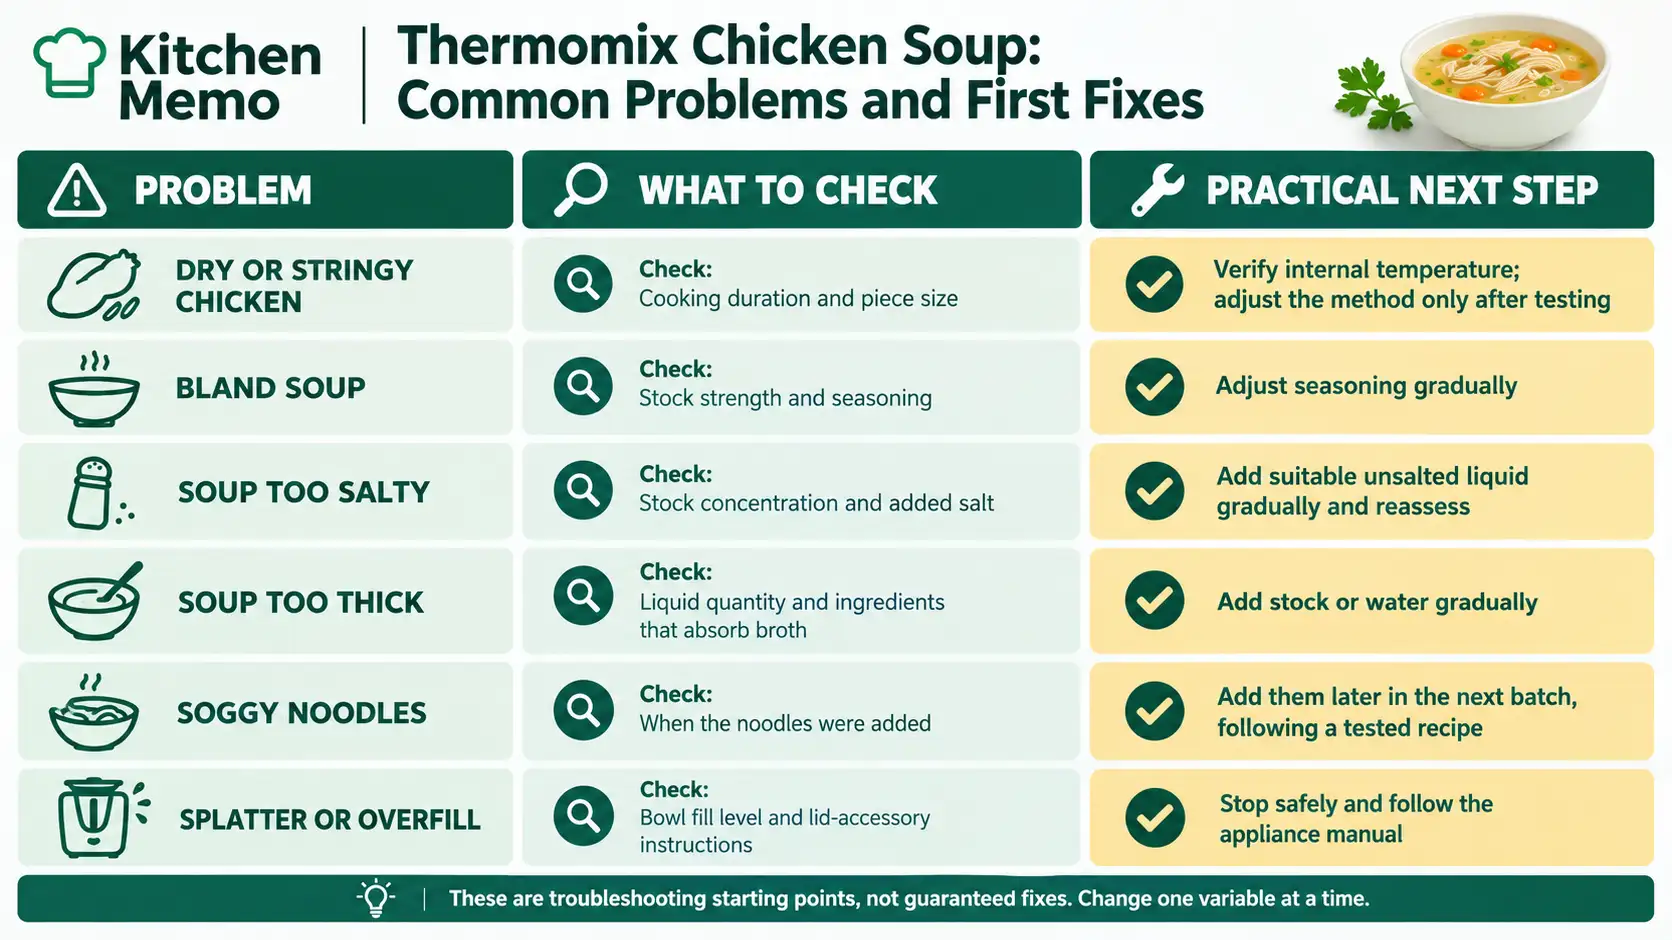
| Problem | Possible cause | Immediate response | Prevention |
| Dry or stringy chicken | Excessive cooking or unsuitable piece size | Check temperature and texture; adjust the method after testing | Test breast and thigh separately |
| Bland soup | Weak stock or unbalanced seasoning | Adjust seasoning gradually | Measure stock paste and salt |
| Too salty | Concentrated stock or excess salt | Dilute cautiously with suitable liquid | Check labels and season at the end |
| Too thin | Too much liquid for the vegetable content | Blend some cooked vegetables or use a tested thickener | Measure liquid and final yield |
| Too thick | Too little free liquid or added thickener | Add liquid gradually | Reserve some stock |
| Cloudy broth | Fine particles, starch or vigorous movement may contribute | Treat appearance as a quality issue, not a safety test | Record the conditions before identifying a cause |
| Splatter or overfill | Excess contents, blocked opening or unsuitable accessory | Stop safely and follow the manual | Respect the fill line and use correct accessories |
| Soggy noodles | Noodles cooked too long or stored in broth | Cook a fresh portion separately where practical | Add noodles at the tested stage |
Before treating these causes and fixes as definitive, validate them through a first-hand troubleshooting log. Record the ingredient quantities, settings and resulting texture for each problem.
Dietary Swaps, Scaling and Nutrition
| Preference | Possible adjustment | What changes |
| Dairy-free | Omit butter or cream; use suitable oil or a plant-based alternative | Flavour and richness |
| Gluten-free | Use suitable gluten-free noodles and check stock, paste and seasonings | Noodle texture and product choice |
| Lower-sodium | Choose a lower-sodium stock and add salt cautiously | Seasoning intensity |
These swaps do not automatically make the entire recipe suitable for every dietary need; check ingredient labels and cross-contact information where necessary.
Scale a recipe only when the altered quantities remain within the model’s maximum fill marking and the cooking method has been validated at the new volume. Do not assume doubling ingredients simply doubles cooking time. Thermomix’s official model-compatibility guidance explains why recipes and capacities differ between models.
Nutrition per serving: Calculate values from the final tested ingredient quantities, specific products and defined serving size. Nutrition figures should be added only after the formula is finalized, with each variation calculated separately.
Storage, Freezing and Reheating
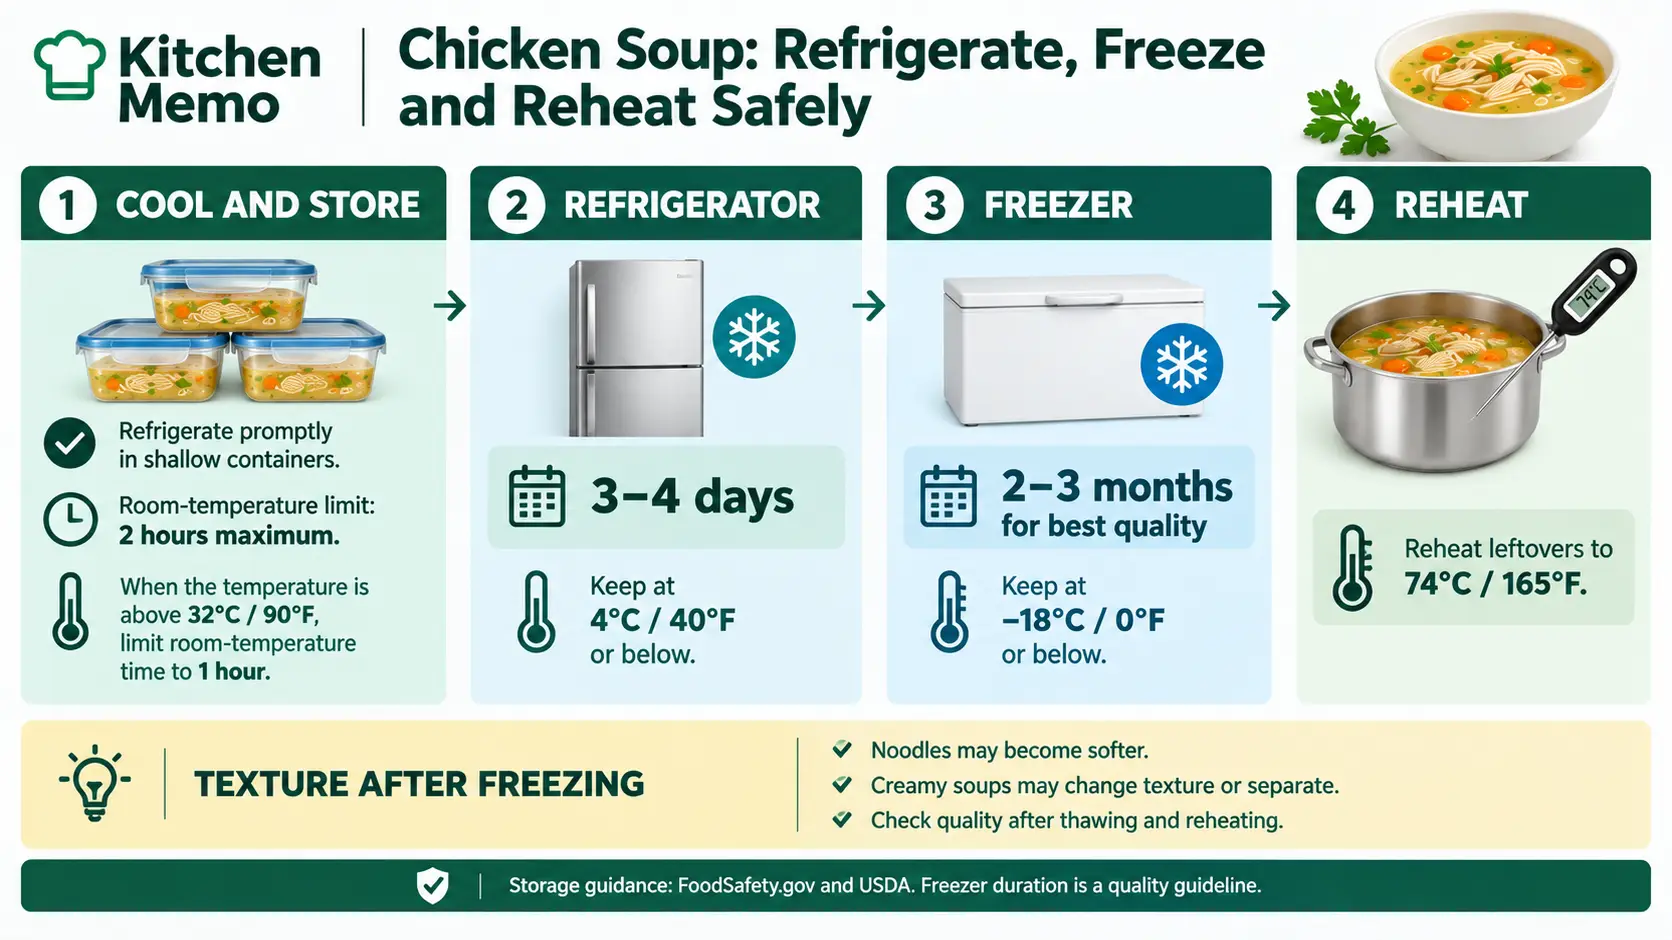
Refrigerate leftover chicken soup promptly in shallow containers. According to the USDA, perishable food should not remain at room temperature for more than two hours, or one hour when the temperature is above 32°C (90°F). Reheat leftovers to 74°C (165°F). See the USDA food-handling guidance.
The FoodSafety.gov cold-storage chart lists 3–4 days refrigerated and 2–3 months frozen for soups and stews. Freezer times are primarily quality guidelines when food remains continuously frozen at −18°C (0°F) or below.
| Version | Refrigerator | Freezer | Reheating tip |
| Chicken and vegetable | 3–4 days | 2–3 months for quality | Reheat until it reaches 74°C/165°F |
| Noodle soup | 3–4 days | 2–3 months for general soup quality guidance | Expect noodles to soften; assess quality after freezing |
| Creamy soup | 3–4 days | 2–3 months for general soup quality guidance | Reheat gently and check for separation |
Cool and store soup promptly rather than leaving the full Thermomix bowl out to cool slowly. Freeze in suitable portions, label the date and thaw safely. To make specific recommendations about noodle texture and cream separation, test a batch after one week in the freezer and document the reheated result.
Conclusion
Reliable Thermomix chicken soup starts with choosing a suitable cut, using settings that match the exact model, respecting the fill line and confirming that the chicken reaches 74°C (165°F). Breast, thigh, chunky and creamy versions should not be treated as interchangeable without testing. Use the troubleshooting table and a model-compatible recipe as your starting point, and explore Kitchen Memo’s Recipes collection for more everyday cooking inspiration.
FAQs
What is the best chicken for Thermomix chicken soup?
Breast is a lean option, while thigh generally gives a richer-tasting result. The best choice for this recipe’s texture and timing should be determined through a controlled side-by-side test.
Can I make Thermomix chicken soup with a whole chicken or carcass?
Do not put a whole raw chicken into the mixing bowl. Use separately cooked chicken or a cooked carcass in a recipe explicitly designed for your Thermomix model.
How do I stop my Thermomix soup splattering or overfilling?
Respect the model’s maximum fill line, keep the lid opening unobstructed and follow the exact instructions for the measuring cup, simmering basket and hot-food settings. On the TM6, follow Vorwerk’s measuring-cup safety guidance for cooking at 95°C (200°F) or above.
Can I freeze Thermomix chicken soup?
Yes. General food-storage guidance gives soups and stews 2–3 months in the freezer for quality. Noodles and cream may change texture, so assess the particular variation after freezing and reheating before describing the result as tested.
What is the secret ingredient in chicken soup?
There is no single universal secret ingredient. Balanced stock, aromatics, appropriate seasoning and a small finishing addition such as fresh herbs or acidity are useful flavour variables to test.
Does chicken soup get better the longer you cook it?
Not always. Longer cooking may change the broth, but it can also damage the texture of chicken that has already reached doneness.
What should you not put in chicken broth?
Avoid unnecessary amounts of salt and ingredients that overpower the flavour. Claims that a particular ingredient inevitably makes broth bitter, cloudy or unsafe should be supported by testing under defined conditions.
What is the first thing I should make in my Thermomix?
A simple soup is a useful introduction because it combines chopping, heating and stirring. Start with a recipe marked compatible with your machine and read its hot-liquid and maximum-fill instructions before cooking.