Introduction
Pizza dough is one of the simplest doughs to make, but getting the texture right by hand can be inconsistent — too much kneading toughens it, too little leaves it slack and hard to shape. A Thermomix removes most of that guesswork. Because it measures, mixes, and kneads in one bowl with a repeatable program, the dough comes out with the same hydration and gluten development every time. This guide walks through a complete Thermomix pizza dough recipe, explains what the machine is actually doing to the dough at each stage, and covers the adjustments needed for gluten-free, no-yeast, Neapolitan, and thin-crust versions.
Quick Summary
- A basic Thermomix pizza dough uses flour, water, yeast, olive oil, and salt, mixed on Dough mode for roughly 2 minutes.
- Fresh yeast produces a slightly faster, more even rise than dried yeast, but both work well in the machine.
- The dough hook attachment isn’t required for most Thermomix models — the mixing bowl blades combined with Dough mode’s slow, reverse-direction motion knead the dough directly.
- No-yeast versions rely on baking powder for a quicker, denser crust; gluten-free versions need a blended flour with xanthan gum for structure.
- Dough can be made a day ahead and cold-proofed in the fridge for better flavor and easier handling.
Why the Thermomix Is Built for Pizza Dough
Pizza dough needs two things to develop properly: consistent hydration (the ratio of water to flour) and enough mechanical action to build gluten strands without overworking them. A stand mixer or hand-kneading can vary from batch to batch depending on how the dough feels to the person making it. The Thermomix instead weighs ingredients directly in the bowl and runs a fixed program, so the same recipe produces the same dough weight and gluten structure each time. This is part of why the recipe shows up so often in home-cooking communities — cooks compare results because the process is standardized enough to actually compare.
Ingredients and Their Role in the Dough

- Flour — provides the gluten network that gives pizza dough its chew and stretch. Bread flour (higher protein) creates a more elastic, chewier crust than all-purpose flour.
- Water — hydrates the flour and activates gluten formation. Room-temperature water is standard; slightly warm water (around 30°C/86°F) speeds up yeast activity.
- Yeast — produces carbon dioxide that leavens the dough. This can be fresh (cake) yeast, active dry yeast, or instant yeast.
- Olive oil — tenderizes the crumb and helps prevent the dough from sticking as it’s shaped, without significantly affecting the rise.
- Salt — strengthens gluten structure and slows yeast activity slightly, which helps control fermentation speed and improves flavor development.
Step-by-Step Thermomix Pizza Dough Recipe
This makes enough dough for two 30cm (12-inch) pizza bases.
- Add 300g water and 7g fresh yeast (or 4g instant dried yeast) to the mixing bowl. Mix 10 seconds/37°C/speed 3 to dissolve the yeast.
- Add 500g bread flour, 20g olive oil, and 10g salt to the bowl.
- Knead using Dough mode for 2 minutes. On models without a dedicated Dough mode, use the interval/kneading function or a low-speed reverse setting for the same duration.
- Remove the dough, shape it into a ball, and place it in a lightly oiled bowl. Cover and leave to rise in a warm spot for 45–60 minutes, or until roughly doubled in size.
- Punch down gently, divide into two portions, and shape each into a ball. Rest for 15 minutes before stretching into pizza bases.
Understanding Thermomix Kneading and Dough Mode
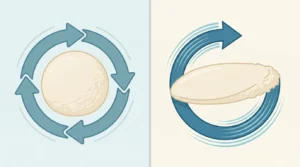
Dough mode (or the equivalent kneading function on older models) rotates the blades slowly and periodically reverses direction. This mimics the folding and stretching motion of hand-kneading rather than the fast shearing action used for blending. The slower speed matters: kneading dough at a high blender speed generates heat and can shear gluten strands apart instead of aligning them, producing a denser, less elastic crust. A separate dough hook attachment exists for some models and can improve handling of very stiff or low-hydration doughs, but it isn’t necessary for a standard pizza dough hydration level — the built-in blades and Dough mode setting are sufficient for most recipes.
Fresh Yeast vs. Dried Yeast in the Thermomix
Fresh (cake) yeast is roughly 2.5 times more concentrated in active cells by weight than dried yeast, so recipes typically use more fresh yeast by weight than dried. Dissolving fresh yeast in the water at the start of the mixing step, as in the recipe above, helps it distribute evenly through the dough before the flour is added. Dried yeast can be added directly with the flour instead of pre-dissolving, since its granules are already stable enough to activate once hydrated during kneading. Both types produce a comparable rise time when the water temperature and proofing environment are the same; the main practical difference is shelf life, since fresh yeast needs refrigeration and use within a couple of weeks, while dried yeast keeps for months in a sealed container.
No-Yeast and Gluten-Free Variations
No-yeast dough replaces the leavening entirely: swap the yeast for 10g baking powder added with the dry ingredients, and skip the rise step — shape and bake immediately after kneading. The result is a denser, cracker-like base rather than an airy, chewy crust, useful when time is short.
Gluten-free dough needs more than a straight flour swap, since gluten is what gives standard dough its stretch and structure. Use a gluten-free bread flour blend and add 5g xanthan gum to help bind the dough. Gluten-free dough is typically wetter and stickier, so it’s easier to press into shape directly in the pizza pan rather than stretching it by hand.
Neapolitan-Style vs. Thin-Crust Dough
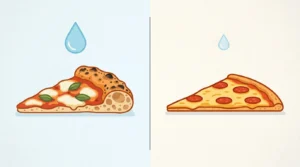
The two styles differ mainly in hydration and fermentation time rather than ingredients. Neapolitan dough uses a higher hydration ratio (around 60–65% water to flour) and a longer, often cold, fermentation of 24 hours or more, which develops flavor and produces the characteristic soft, blistered, chewy edge. Thin-crust dough uses less water relative to flour, a shorter rise, and is rolled rather than hand-stretched, giving a crisper, cracker-like base that holds toppings without becoming soggy in the center.
Model Differences: TM31, TM5, TM6, and TM7
The core pizza dough process is essentially the same across Thermomix generations, since flour, water, yeast, and kneading time don’t change with the machine. The differences are in the interface: the TM31 has a manual dial and simpler kneading control, the TM5 introduced the Cook-Key and guided recipe chip system, and the TM6 and TM7 include built-in Dough programs with preset times and an integrated recipe platform (Cookidoo) that can auto-adjust quantities. In practice, this means a recipe written for one model can be used on any of them by matching the ingredient weights and using each model’s equivalent kneading setting for the same duration.
Troubleshooting Common Dough Problems
- Dough too sticky: Add flour a tablespoon at a time during kneading rather than all at once, which prevents overcorrecting into a dry, dense dough.
- Dough won’t rise: Check the yeast is still active and the water used to dissolve it wasn’t hot enough to kill it — Thermomix’s 37°C setting is calibrated to avoid this.
- Dough tears when stretching: This usually means it wasn’t kneaded long enough to build sufficient gluten, or it wasn’t rested long enough after shaping into balls for the gluten to relax.
- Crust comes out tough: Often caused by over-kneading or too little oil in the dough; reducing kneading time slightly or adding a touch more olive oil can soften the texture.
Storage and Make-Ahead Tips
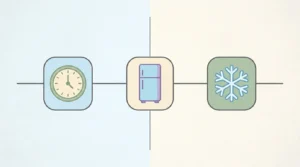
Pizza dough can be refrigerated after the first rise for up to 48 hours, wrapped or in a sealed container — this slow, cold fermentation actually improves flavor compared to same-day dough. For longer storage, portioned dough balls freeze well for up to three months; thaw overnight in the fridge before bringing to room temperature and shaping. Same-day dough is also workable when time is short, since the Thermomix’s consistent kneading speeds up gluten development compared to hand-mixing.
Conclusion
A Thermomix pizza dough recipe comes down to the same fundamentals as any pizza dough — flour, water, yeast, salt, and oil — combined with a machine that removes the variability of manual kneading. Once the base ratios and kneading time are understood, the same process adapts easily to gluten-free flour, no-yeast shortcuts, or the longer fermentation used for Neapolitan-style crusts, regardless of which Thermomix model is used.
FAQ
Does the Thermomix need a dough hook attachment for pizza dough? No. The standard mixing bowl blades combined with Dough mode’s slow, reverse-kneading action are enough for typical pizza dough hydration. A dough hook is more relevant for stiffer, low-hydration doughs.
How long should pizza dough knead in a Thermomix? Around 2 minutes on Dough mode is standard for a basic pizza dough — enough to develop gluten without overheating the mixture.
Can I use fresh yeast instead of dried yeast? Yes. Dissolve fresh yeast in the water before adding the flour; use roughly 2.5 times the weight of dried yeast called for in a recipe.
Is Thermomix pizza dough good for Neapolitan-style pizza? Yes, with adjustments — use a higher hydration ratio and a longer cold fermentation (24+ hours) rather than the shorter same-day rise used for a standard thin crust.
Can this dough be made gluten-free? Yes, by substituting a gluten-free bread flour blend and adding xanthan gum, though the dough will be wetter and easier to press into a pan than to hand-stretch.