Homemade soups can turn out bland, watery, too salty or thicker than expected, even when you start with good ingredients. The solution is to understand how a soup works rather than follow a recipe every time. Most soups combine aromatics, a liquid base and main ingredients, then build flavor through cooking, seasoning and finishing. Once you understand ingredient order, liquid choice and thickening methods, you can make soups from vegetables, legumes, meat or leftovers with greater confidence. This guide explains a flexible soup-making method, how to diagnose common problems and how to store your finished soup safely.
Quick Summary
- Start with aromatics, add the main ingredients and liquid, simmer until tender, then adjust the texture and final seasoning.
- Flat flavor, excess salt and watery texture often come from the base, ingredient order or seasoning decisions.
- Potatoes, beans and puréed vegetables can create body without flour or cream.
- Cool soup promptly in shallow containers. Add delicate pasta and cream after thawing when their texture is a concern.
What Do You Want to Make, and What Usually Goes Wrong?
Most disappointing soups can be traced to four things: a weak flavor base, unsuitable ingredient timing, excessive seasoning or insufficient body. Undercooked vegetables may taste harsh, while vegetables simmered too long can lose their shape. Too much liquid produces a thin soup, and salty stock combined with early seasoning can make the finished pot difficult to balance.
Use this quick guide to find the most relevant section.
| I want to… | Start with… |
| Make a thick soup | How Soup Gets Body |
| Make a clear, brothy soup | Choosing the Liquid and the Soup Type |
| Make a creamy soup without cream | How Soup Gets Body |
| Use leftover vegetables or cooked meat | The Recommended Method |
| Prepare soup ahead | Cooling, Storing, Freezing and Reheating |
When troubleshooting a soup, identify the main problem before changing the ingredients. For example, a thin soup may need more body, while a flavorful soup that tastes weak may need better seasoning rather than additional cooking time.
Your Options: Choosing the Liquid and the Soup Type
Stock vs. Broth vs. Bouillon vs. Water
Stock, broth, bouillon and water can all form a useful soup base, but their flavor, body and salt contribution differ.
| Liquid | Flavor | Body | Salt level | Best for and how to adjust |
| Stock | Savory, often built from bones and aromatic vegetables | Can be rich and gelatinous | Depends on preparation or product | Soups needing body; check seasoning before adding salt |
| Broth | Often lighter, with meat or vegetable flavor | Usually lighter than gelatin-rich stock | Varies widely | Chicken, vegetable and clear soups; taste before seasoning |
| Bouillon | Concentrated, seasoned flavor | Varies by product | Often high | Building flavor quickly; follow the label and reduce added salt |
| Water | Neutral; contributes no added stock flavor | Depends on the ingredients | None initially | Vegetable, bean and strongly flavored soups; develop flavor through aromatics and seasoning |
These descriptions reflect common culinary usage, not universal definitions. Product labels and regional terminology vary. The Institute of Culinary Education’s overview of stock-making explains the traditional importance of bones, vegetables and aromatics when developing stock.
Water is a perfectly reasonable starting point when the main ingredients carry enough flavor. The important step is to taste the finished base before adjusting salt, particularly when using commercial stock or bouillon. When comparing different liquids, remember that their sodium content and concentration vary by brand, so the same quantity may produce noticeably different results.
Soup vs. Stew vs. Chowder vs. Bisque vs. Purée
These terms overlap, but liquid level, texture and preparation method provide useful clues.
| Type | Typical texture | Common ingredients or method | Example and identifying cue |
| Soup | Clear to thick, with varying amounts of liquid | Vegetables, meat, legumes or other ingredients in liquid | Chicken noodle soup has visible broth around the ingredients |
| Stew | Thick, with substantial pieces and less free liquid | Meat or vegetables cooked in a smaller amount of liquid | Beef stew has a concentrated, gravy-like consistency |
| Chowder | Hearty and chunky | Often seafood or vegetables, commonly with potatoes and dairy | Corn chowder retains recognizable pieces of corn and vegetables |
| Bisque | Smooth, rich and often creamy | Traditionally associated with puréed shellfish; modern usage can be broader | Lobster bisque is a classic example |
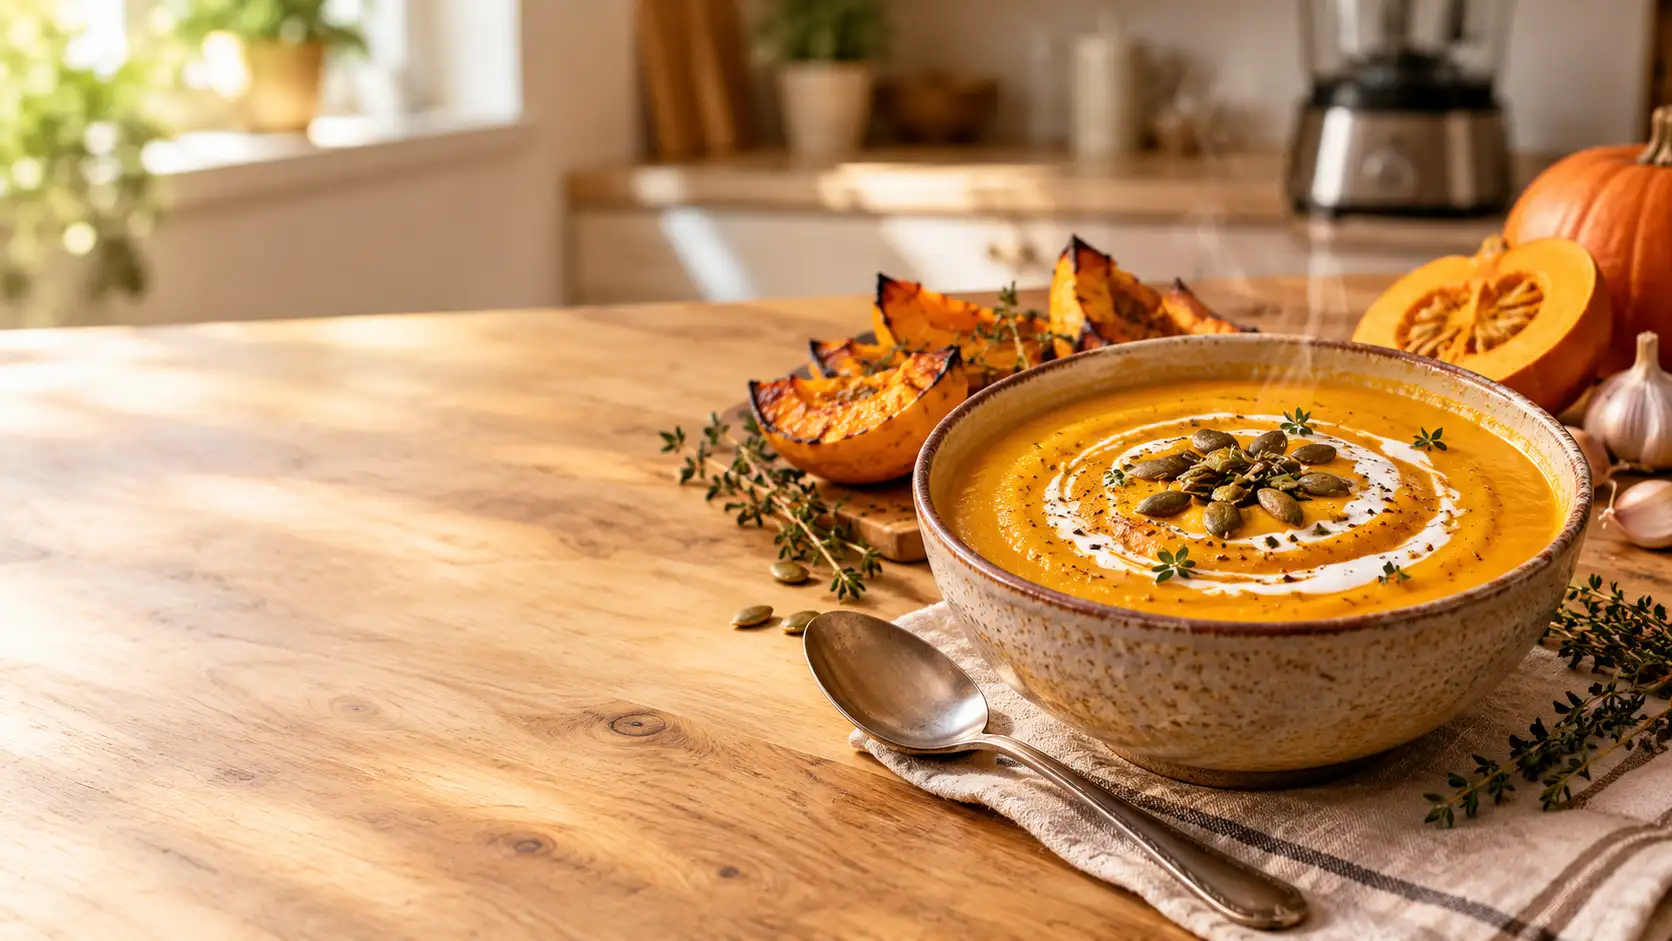
| Purée soup | Blended and relatively uniform | Cooked ingredients blended into the liquid | Pumpkin soup has a smooth texture when fully blended |
Traditional culinary classifications distinguish shellfish bisques from ordinary cream soups, but modern menus sometimes use bisque for smooth vegetable soups. Chowders also vary in ingredients and thickness. The University of Illinois Extension’s explanation of bisque, chowder and stew discusses these distinctions and their overlapping uses.
Why Results Differ: Order, Timing and Body
Ingredient Order and Timing
Add ingredients according to how quickly they cook, rather than putting everything into the pot at once. Aromatics usually go first because gentle cooking softens their flavor and develops the base. Dense vegetables need more time than delicate greens, while pasta and fresh herbs are generally better added near the end.
The following timings are broad starting estimates, not fixed rules. Actual cooking depends on piece size, quantity, equipment and simmer intensity.
| Ingredient group | When it goes in | Approximate timing | Doneness cue |
| Onion, celery and carrot | At the beginning, in a little fat | Often 5–10 minutes to soften on the stovetop | Softened and fragrant; browned only when intended |
| Potato, carrot and other dense vegetables | Early, after the aromatics | Often 10–25 minutes, depending on size | Easily pierced with a fork |
| Dried lentils | Early enough to finish cooking in the liquid | Follow the variety and package guidance | Tender throughout |
| Raw poultry | According to the recipe and liquid volume | Variable; use a thermometer rather than time alone | Reaches 165°F (74°C) internally |
| Zucchini, peas and tender vegetables | Later in the simmer | Often a few minutes, depending on size | Tender without losing all their shape |
| Pasta | Near the end | Follow package instructions and check early | Just tender, not mushy |
| Fresh herbs and finishing acid | At the end | Usually just before serving | Fresh aroma and balanced flavor |
For poultry, follow the USDA’s safe food-handling guidance. A clock alone cannot confirm safe doneness.
Add acid and delicate herbs toward the end when you want their freshness to remain noticeable. Ingredients such as wine or tomatoes may need to cook earlier when the recipe requires their flavors to develop.
For a machine-specific example of building flavor through onion preparation, see French Onion Soup Thermomix.
The best way to judge timing is to check the ingredients themselves. Cutting vegetables into similarly sized pieces helps them cook more evenly, while checking tenderness during the simmer reduces the risk of leaving delicate vegetables in the pot for too long.
How Soup Gets Body (Thickening Without Flour or Cream)
Soup gets its body from ingredients that release starch, from blending cooked ingredients into the liquid, or from emulsified fat. These methods create different textures, so choose one that suits the soup rather than thickening every pot the same way.
| Method | How to use it | Texture and flavor effect | Dietary consideration |
| Potato | Simmer until tender, then leave in pieces or blend into the soup | Soft, hearty body | Naturally gluten-free |
| Blended beans or lentils | Blend some cooked legumes with liquid and return the mixture to the pot | Creamy texture with a substantial legume flavor | Naturally gluten-free; check packaged ingredients |
| Roux (flour and fat) | Cook flour with fat, then incorporate liquid gradually | Smooth, rich thickness | Contains gluten unless made with a suitable alternative |
| Cornstarch slurry | Mix cornstarch with cold liquid before stirring it into hot soup | Relatively smooth, sometimes glossy | Check the product label |
| Ground nuts | Add finely ground nuts in small amounts and blend or stir thoroughly | Richness and a distinct nutty flavor | Contains or may introduce nut allergens |
| Purée of the soup itself | Blend a portion and return it; adjust until the desired consistency is reached | Thickens without adding a separate thickener | Depends on the ingredients already in the soup |
The amount of thickener depends on the soup’s volume, the ingredients and the texture you want. Add it gradually, allow time for the consistency to develop, and reassess before adding more. This is particularly important with starches, which can make a soup much thicker than intended if added too quickly.
For a neutral flavor change, blend some of the cooked vegetables or legumes and stir them back into the pot. For examples of these textures, see Thermomix Pumpkin Soup, Broccoli Soup Thermomix and Thermomix Lentil Soup.
The Recommended Method: A Soup Formula That Works for Almost Any Soup
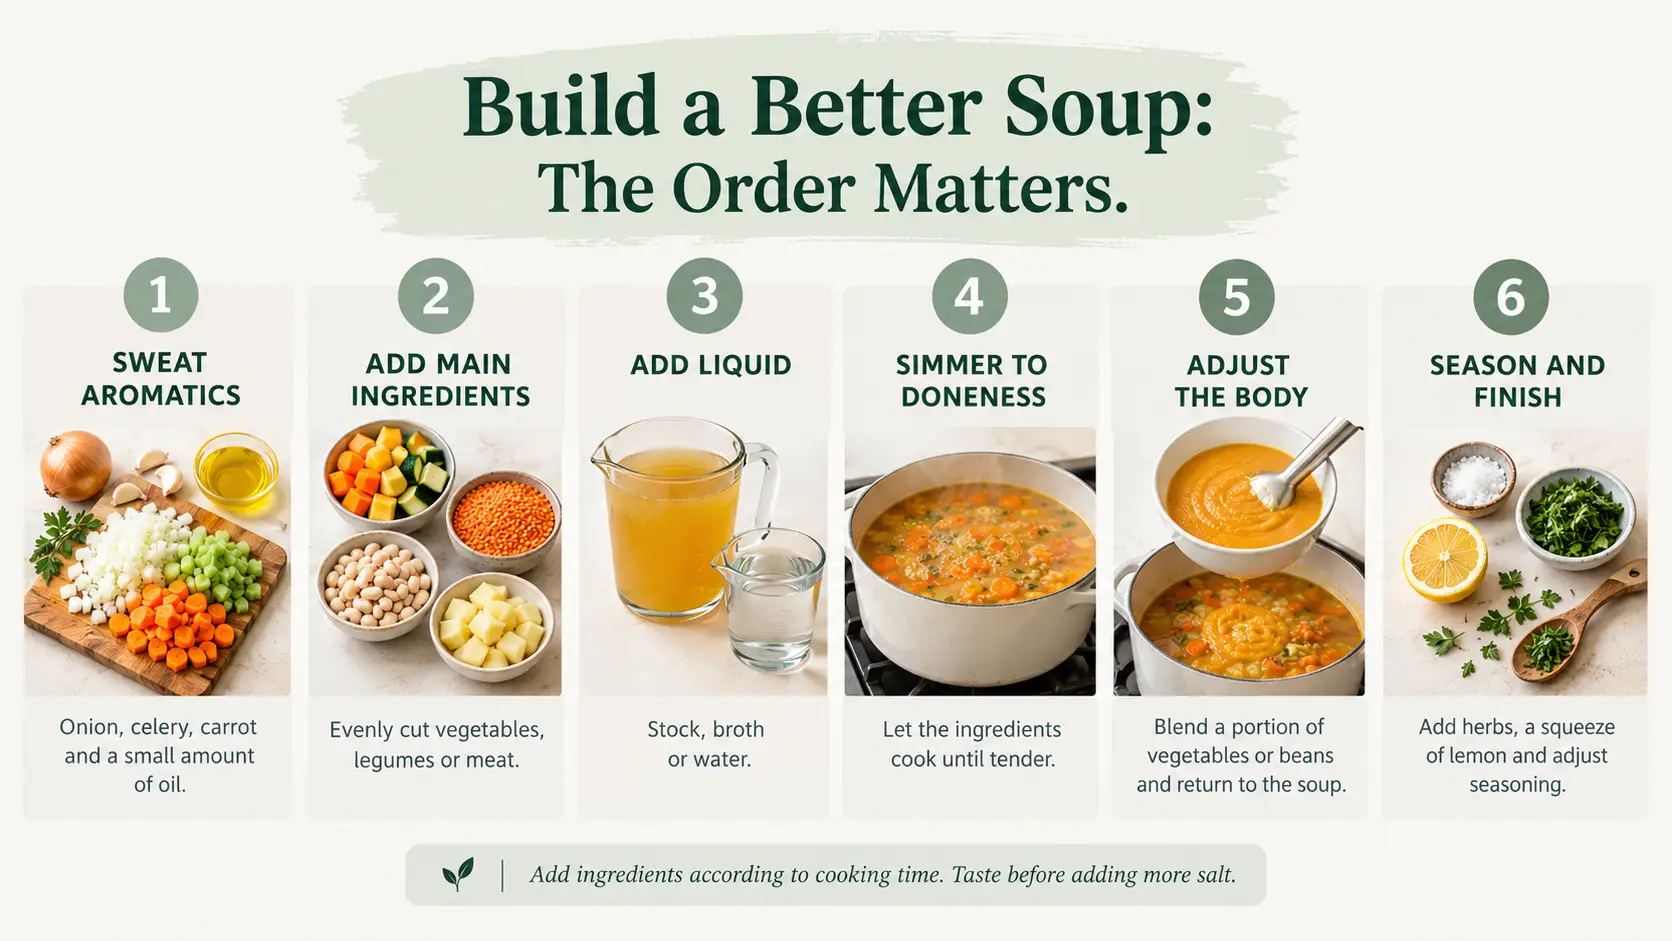
Formula Card
A flexible soup formula starts with aromatics, a main ingredient, enough liquid to cook the ingredients and a way to adjust the final body. The precise quantities depend on whether you want a clear broth, a chunky vegetable soup or a thick purée, so treat the following as a framework rather than a fixed recipe.
| Component | Starting approach | Purpose and adjustment |
| Aromatics | Use a suitable combination of onion, leek, celery, garlic or other aromatics | Build the flavor base; choose ingredients that complement the main ingredient |
| Liquid | Add enough stock, broth or water for the intended cooking method and texture | Begin conservatively when possible and reserve extra liquid for adjustments |
| Main ingredients | Choose vegetables, legumes, meat or a combination, cut into reasonably even pieces | Provide the main flavor, substance and nutritional components |
| Body | Use naturally starchy ingredients, puréed vegetables, legumes or a suitable thickener | Add gradually and stop when the texture is right |
| Seasoning | Add salt in stages and taste before the final adjustment | Account for salt already present in stock, bouillon and other ingredients |
There is no single liquid-to-ingredient ratio that works equally well for every soup. Leafy vegetables release and collapse differently from potatoes and legumes, while a blended soup needs a different consistency from a clear broth. Adjust the liquid to the ingredients and intended result, then record the quantities that work well for your preferred combinations.
The Thermomix Vegetable Soup guide provides a related practical recipe example.
Step-by-Step Process
- Sweat the aromatics. Cook onion, celery, leek or other suitable aromatics gently in a little fat until softened and fragrant. Brown them only when the desired soup benefits from that deeper flavor.
- Add the main ingredients. Put in vegetables, legumes or meat according to their cooking needs. Cut ingredients into reasonably even pieces to encourage consistent cooking.
- Add the liquid and simmer. Use stock, broth or water as appropriate. Aim for a gentle simmer rather than vigorous boiling, and cook until the main ingredients reach their intended doneness.
- Adjust the body. Blend part of the soup, add a suitable thickener or reduce excess liquid if the ingredients can tolerate further cooking.
- Season in stages. Taste before adding more salt. Liquid reduction concentrates existing seasoning, so heavily salting early can leave the finished soup too salty.
- Finish and taste again. Adjust seasoning, then add a little acid or fresh herbs when appropriate. Make small changes, tasting after each addition.
Conditions and Limits
This method works best for many everyday vegetable, legume and meat soups, but it is not universal. Cream soups may need gentler heating to limit separation. Traditional bisques can require specific shellfish preparation. Cold soups need a different approach because they are not simmered for finishing. Long-simmered bone broths also need more attention to extraction, time and liquid level than a quick vegetable soup.
Treat the formula as a flexible framework, not a replacement for the specialized technique that a particular soup requires.
Diagnose and Fix Your Soup
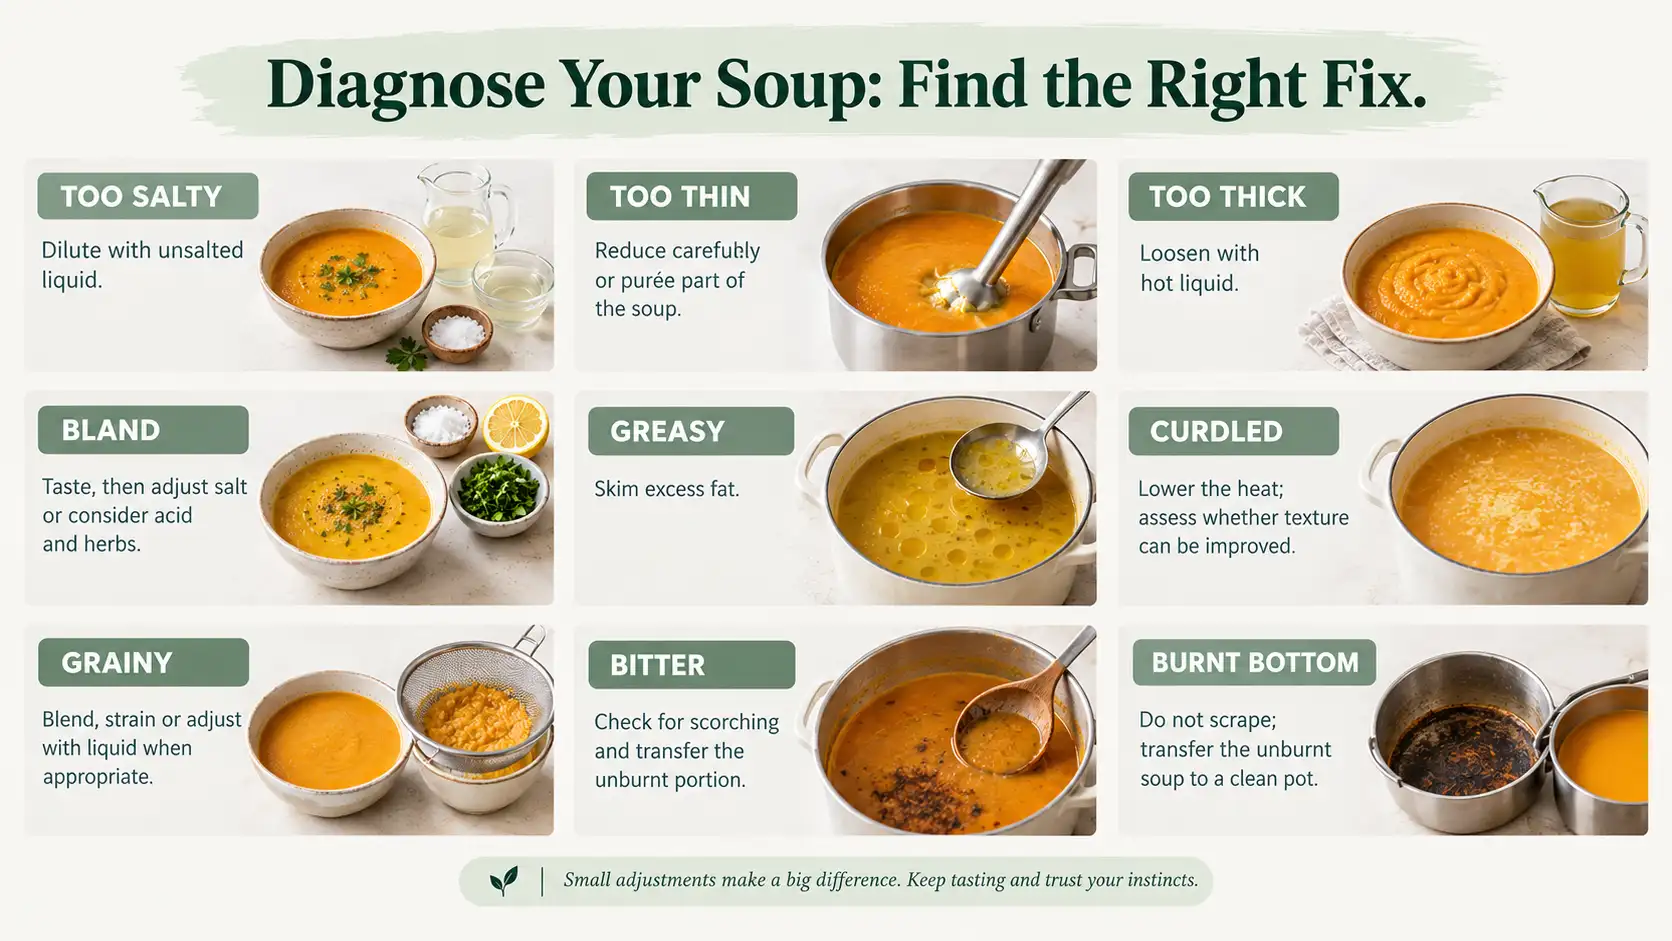
The “Diagnose Your Soup” Table
Change one thing at a time, then taste or inspect the texture again. This makes it easier to identify the cause without accidentally creating a second problem.
| Symptom | Why it happens | How to fix it | How to prevent it | What not to do |
| Too salty | Excess salt, salty stock or too much reduction | Dilute with unsalted liquid or add more unsalted ingredients | Season gradually and taste after reduction | Rely on a potato to remove salt |
| Too thin or watery | Too much liquid or insufficient body | Reduce carefully or purée part of the soup | Adjust liquid to the ingredients and intended texture | Add dry flour directly to hot soup |
| Too thick | Too much reduction, starch or purée | Stir in hot water or suitable unsalted stock a little at a time | Add thickener gradually | Add salty stock without tasting |
| Bland | Weak aromatics, insufficient seasoning or poor flavor balance | Check salt first, then consider acid, umami or herbs | Develop the base before adding the final liquid | Keep adding salt without tasting |
| Greasy | Excess fat or fat released from meat | Skim the surface or chill and remove solidified fat | Trim excess fat and measure added oil | Stir more oil into the pot |
| Curdled | Dairy has separated under unsuitable heat or acidity | Reduce the heat; blending or straining may improve appearance | Add dairy carefully near the end | Boil aggressively or assume separation is always reversible |
| Grainy | Incomplete blending, ingredient skins or an unsuitable starch texture | Blend further, strain if appropriate, or loosen with liquid | Cook ingredients until tender and blend as needed | Assume every grainy texture can be fixed completely |
| Bitter | Scorched aromatics, burnt ingredients or an unsuitable balance of flavors | Remove the unburnt portion from the pot and reassess; severe bitterness may be irreversible | Monitor heat and avoid scorching | Scrape burnt material into the soup |
| Burnt bottom | Ingredients have scorched against the pot | Transfer the unburnt upper soup to a clean pot without scraping the bottom | Stir when needed and control heat | Stir the burnt layer back into the soup |
The success of a correction depends on how severe the problem is and what ingredients are in the pot. Small changes are usually easier to control than large additions, and some problems—particularly a strongly burnt flavor or severely separated sauce—may not be fully reversible.
Salt Rescue: What Actually Works
The most dependable way to correct over-salted soup is to reduce the salt concentration by adding unsalted liquid or more unsalted ingredients. This may increase the volume of soup, but it directly addresses the imbalance.
Acid can brighten the flavor and change how salty the soup tastes, but it does not remove sodium. Adding a potato is not a reliable way to selectively extract salt either. If the soup is only slightly too salty, a carefully chosen addition may improve the overall balance; if it is heavily oversalted, dilution is the more dependable approach.
Add a little unsalted liquid, stir well and taste before making another adjustment. If the dilution weakens the flavor too much, build the flavor back with suitable aromatics or other unsalted ingredients rather than immediately adding more salt.
Thin, Greasy or Bland Soup
For thin soup, simmer it uncovered when the other ingredients can tolerate reduction, or blend a portion of the cooked vegetables or legumes and return it to the pot.
For greasy soup, skim fat from the surface while the soup is hot enough for the fat to remain fluid, or refrigerate it so solidified fat can be removed more easily.
For bland soup, first check whether the seasoning is adequate. If it is, try a small addition of acid, an appropriate umami ingredient or fresh herbs. Taste after each adjustment. More salt is not always the answer, and these finishing options should be adapted to the soup rather than added automatically.
Getting It Right Every Time: Cooling, Storing, Freezing and Reheating
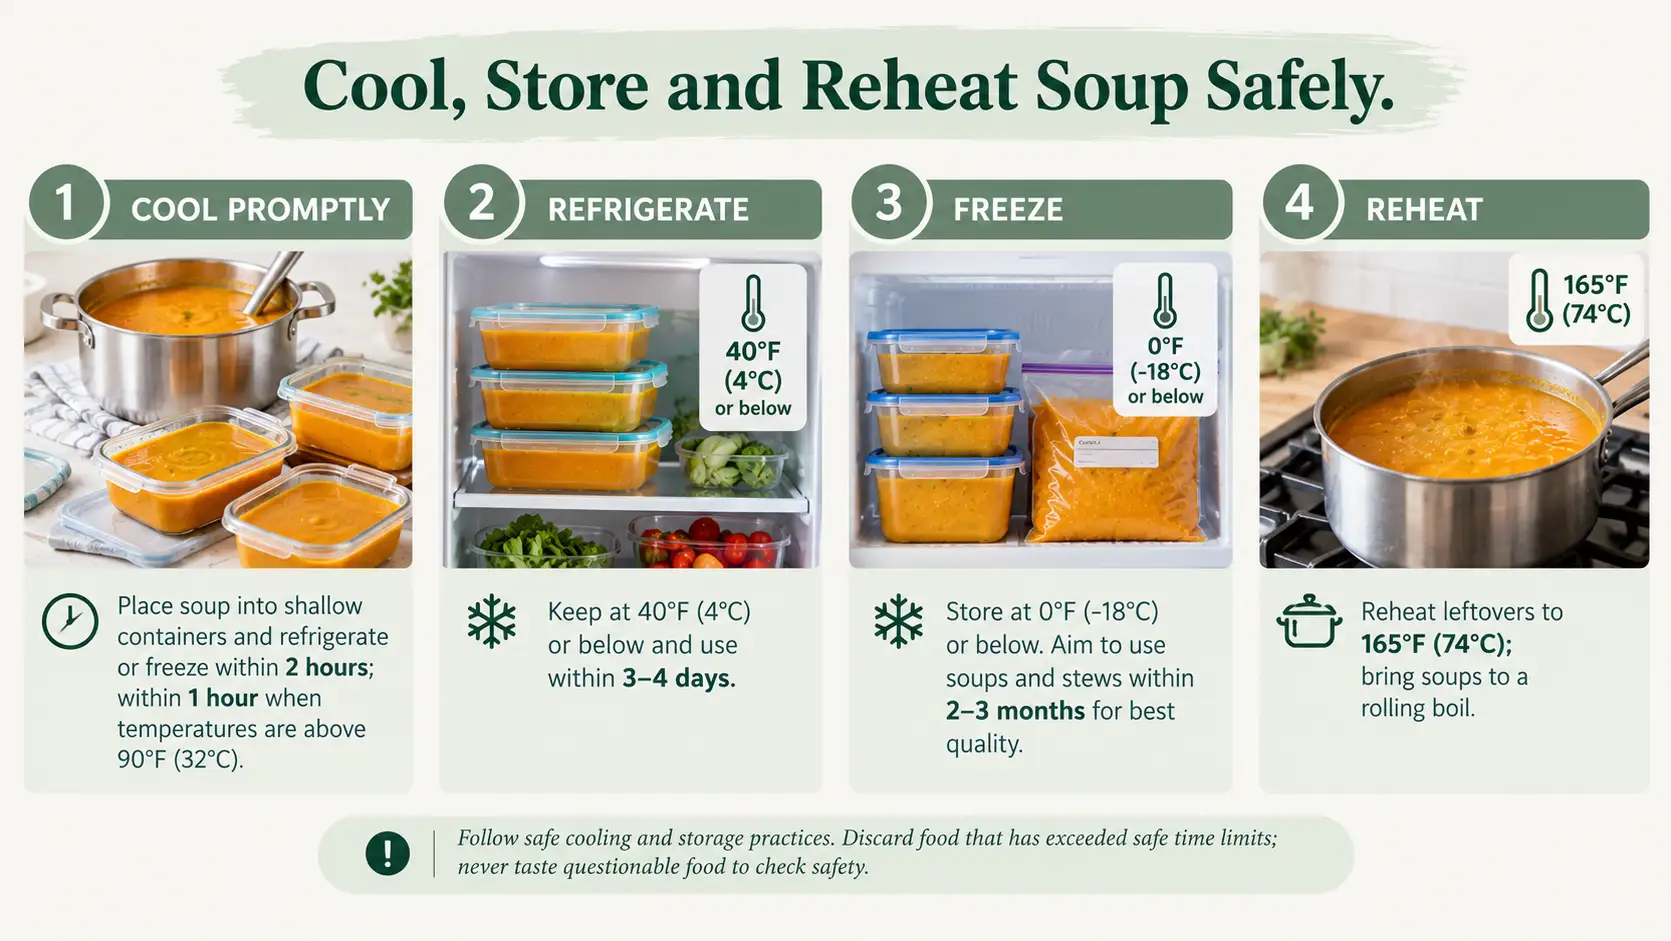
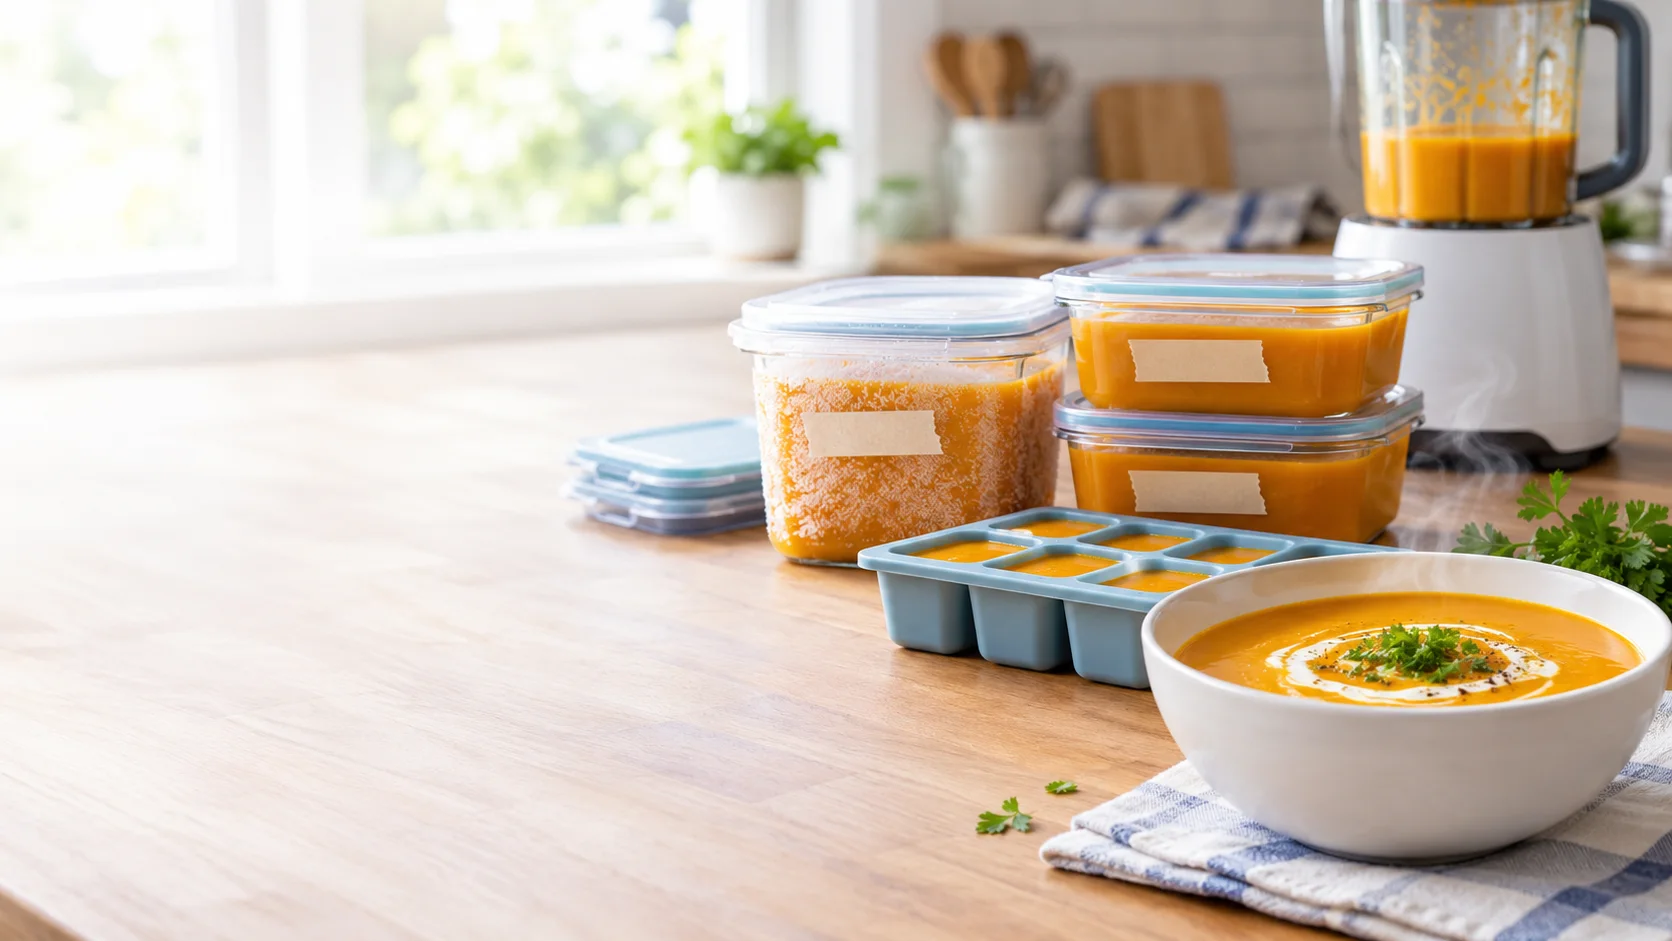
Cool soup in shallow containers so it loses heat more quickly than it would in a large pot. The USDA advises refrigerating or freezing leftovers within two hours, or within one hour when the surrounding temperature is above 90°F (32°C). Do not leave a large pot on the counter until it feels completely cool.
| Storage stage | Guidance | Container and method |
| Refrigeration | Use within 3–4 days; keep the refrigerator at 40°F (4°C) or below | Divide into shallow, covered containers |
| Freezing | For soups and stews, aim for 2–3 months for best quality | Use freezer-safe, airtight containers and allow room for expansion |
| Thawing | Thaw in the refrigerator or use a safe microwave method | Keep portions sealed during refrigerator thawing |
| Reheating | Reheat leftovers to 165°F (74°C); bring soups, sauces and gravies to a rolling boil | Heat evenly, stir as needed and check temperature |
| Spoilage and mishandling | Discard soup that has exceeded safe time limits or shows signs of spoilage | Never taste questionable food to determine whether it is safe |
These figures follow the USDA’s guidance on leftovers and food safety and freezing and food safety. Freezer storage periods are primarily quality guidance; properly frozen food remains safe indefinitely while continuously frozen, although its quality can decline.
Freezes Well vs. Freezes Badly
| Soup component | What may happen after freezing | Better approach |
| Broth-based vegetable soup | Tender vegetables may soften further | Cool promptly and freeze in portions |
| Bean or lentil soup | Texture may become thicker after thawing | Stir well and loosen with hot liquid if needed |
| Cream-based soup | Cream may separate or develop a different texture | Freeze the base before adding cream when practical |
| Soup with pasta | Pasta may soften and absorb more liquid | Freeze the soup base and add freshly cooked pasta after thawing |
| Potato soup | Potatoes may become grainy, crumbly or softer | Expect a possible texture change; blend or adjust the liquid if appropriate |
Freezing changes texture differently depending on the ingredients, preparation method and how the soup is reheated. Dairy-based soups may separate, while pasta can absorb liquid and become softer. If texture is particularly important, freeze the soup base separately and add cream, pasta or other delicate components after thawing.
For a focused appliance-specific discussion, see Can You Freeze Thermomix Soup?.
A useful meal-prep habit is to freeze single-serving portions, label them with the date and reheat only what you need.
Equipment, Scaling and Beginner Mistakes
| Equipment | Hands-on time | Browning and liquid | Blending |
| Stovetop | Requires monitoring and stirring | Easy to adjust heat and evaporation; aromatics can brown in the pot | Use an immersion blender or transfer carefully to a suitable blender |
| Slow cooker | Low during the cooking stage | Browning is limited unless done separately; liquid evaporation is generally lower | Blend separately if the appliance does not support it |
| Pressure cooker | Shorter active cooking for suitable ingredients, but setup and pressure release still take time | Sauté first when available; follow the manufacturer’s minimum-liquid and maximum-fill rules | Blend after cooking if appropriate |
| Thermomix | Can combine chopping, heating, stirring and blending | Results depend on the model, program and ingredient quantity | Follow model-specific instructions and fill limits |
For more appliance-specific ideas, explore Thermomix Soup Recipes.
When scaling a soup, do not assume salt, liquid or cooking time should increase in exact proportion to the number of portions. Increase ingredients thoughtfully, account for the capacity of the equipment and adjust seasoning only after the flavors develop. A larger pot may heat and cool differently, while a fuller blender or appliance can have different operating limits from a smaller batch.
Common beginner mistakes include adding everything at once, salting heavily before reduction, boiling delicate ingredients too long and using more thickener than the soup needs.
Conclusion
Making soups without a recipe becomes easier when you understand the base, ingredient order, liquid level and methods for building body. Taste in stages, make small adjustments and use the troubleshooting table when a pot goes wrong. Once you understand these checkpoints, you can turn a wide range of available ingredients into a satisfying soup without depending on a single recipe.
FAQs
Can I make soup with water instead of stock?
Yes. Build flavor with well-cooked aromatics, appropriate seasoning and a suitable finishing ingredient. Water has no added stock flavor or salt, so adjust the finished soup to taste.
How do I thicken soup without flour or cream?
Blend a portion of the soup, or use suitable ingredients such as potato or beans to create body. Choose a method that suits the flavor and texture you want.
How do I fix soup that is too salty?
Add unsalted liquid or more unsalted ingredients to dilute the salt concentration. Acid and potato are not reliable substitutes for dilution.
What is the difference between soup and stew?
Soup usually has more free liquid, while stew generally contains larger pieces and a thicker, more concentrated liquid. The boundary is not absolute.
How long does soup last in the fridge, and can I freeze it?
Refrigerate soup promptly and use it within 3–4 days. Soups and stews generally keep their best freezer quality for 2–3 months. Dairy and pasta may be better added after thawing.
Why is my soup bland even after adding salt?
It may need better-developed aromatics, a little acidity or a suitable umami ingredient rather than more salt. Make one small adjustment at a time and taste again.